
How to Hook Up an Air Hose to a Compressor?
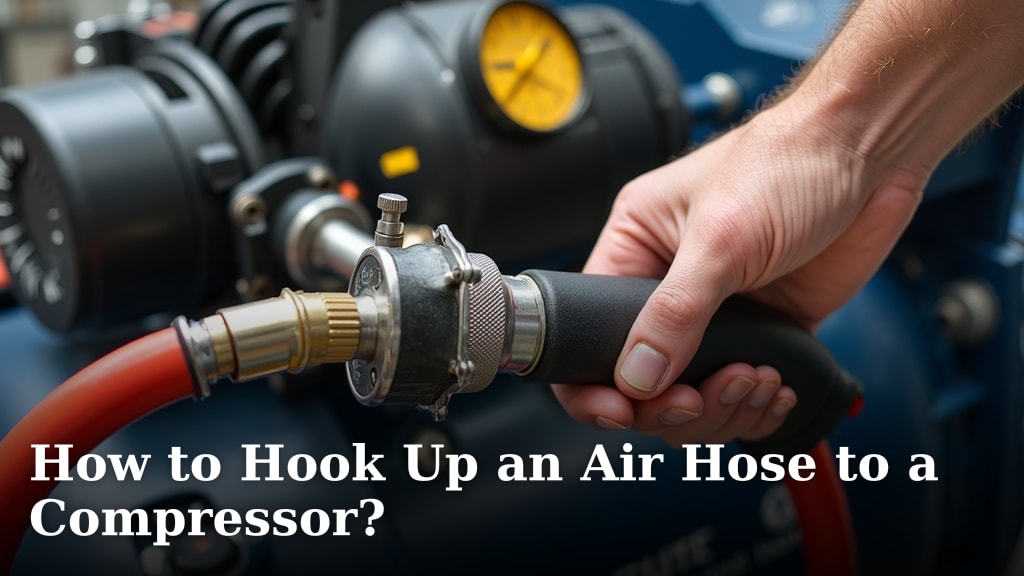
To hook up an air hose to a compressor, you simply connect the male fitting on your air hose directly into the female quick-connect coupler on your air compressor. You’ll hear a click when it’s securely in place.
This quick connection system is standard for most air tools and compressors, making it super convenient. Ensuring a tight, leak-free seal is important for optimal performance and safety. Don’t worry, it’s easier than it sounds!
- Connect the air hose to the compressor’s quick-connect coupler.
- Always check for a secure, clicked-in fit.
- Ensure your air tools also have matching fittings.
- Double-check for air leaks before use.
In this guide, we’ll walk through exactly how to connect your air hose and compressor, step by careful step. We’ll also share tips for a better, safer experience.
Connecting Your Air Hose to the Compressor: A Straightforward Guide
Connecting your air hose to an air compressor is a core skill for any DIY enthusiast or professional. It’s a simple process, but understanding each step ensures a safe and efficient setup.
You’ll primarily be working with two components: your air hose and the air compressor itself. The goal is to create a secure, airtight connection.
Understanding Your Air Compressor and Hose Fittings
Before making any connections, it helps to know what you’re looking at. Air compressors often feature a quick-connect system. This offers convenience and speed.
Most quick-connect fittings are standardized. However, there are a few types. Knowing yours helps ensure compatibility.
Common Types of Quick-Connect Fittings
You’ll typically encounter two main styles in North America, often called automotive (A-style) and industrial (I-style). While they look similar, their internal dimensions are different.
You cannot effectively mix and match these types. Using incompatible fittings can lead to leaks or unsafe connections (research by Compressed Air Best Practices Magazine shows this).
- Automotive (A-style): Also known as T-style or Tru-Flate. Often found on smaller home compressors.
- Industrial (I-style): Also known as D-style or Milton. More common in workshops and industrial settings.
- Universal Couplers: Some newer couplers are designed to accept both A-style and I-style plugs. These are a great innovation for versatility.
Check your compressor’s manual or examine the existing fittings on your air tools. This helps you identify the correct fitting style.
Air Hose Connections: Male Plugs and Female Couplers
Your air hose will typically have a male quick-connect plug already attached or ready to be attached. This plug inserts into the female quick-connect coupler on the compressor.
The compressor usually has a female quick-connect coupler. This coupler is designed to receive the male plug from your hose. It features a collar that slides back to allow the plug to enter.
Step-by-Step Connection Process
Ready to make that connection? It’s quicker than you think. Always ensure your compressor is off and depressurized before starting.
Step 1: Prepare Your Equipment
First, make sure your air hose and compressor are in good condition. Look for any visible damage on the hose or fittings. A damaged hose can be a safety hazard.
Ensure the compressor’s air tank is drained of any condensation. This helps prevent rust and improves air quality (Air Compressor Guide recommends this for longevity).
Is your compressor plugged in but not running? Go ahead and do that. Then, make sure the compressor’s main power switch is off. This is a key safety measure.
Step 2: Locate the Quick-Connect Coupler on Your Compressor
Find the quick-connect coupler on your air compressor. It’s usually located near the air pressure gauge and regulator. It looks like a small metal cylinder with a sliding collar.
This is where your hose will plug in. It’s the central point for air delivery.
Step 3: Insert the Male Plug of the Air Hose
Take the end of your air hose with the male quick-connect plug. Push the sliding collar on the compressor’s female coupler back towards the compressor body. This opens the mechanism.
With the collar held back, firmly push the male plug into the female coupler. You should feel it slide in completely.
Step 4: Release the Collar and Secure the Connection
Once the male plug is fully inserted, release the sliding collar on the female coupler. It should snap forward, locking the plug in place.
Give the hose a gentle tug to ensure it’s securely fastened. You should hear a distinct “click” sound when it locks correctly. If it doesn’t click, try reinserting it.
This “click” is your assurance that the connection is solid.
Pre-Operation Checks and Safety Considerations
Connecting the hose is just the first part. A few important checks ensure everything runs smoothly and safely.
Checking for Air Leaks
Leaks are efficiency killers and can drain your compressor’s tank quickly. Once connected, turn on your compressor and let it build pressure.
Listen carefully for a hissing sound around the connection point. You can also use a simple spray bottle filled with soapy water. Spray it generously around the connection.
If you see bubbles forming, even small ones, you have a leak. Tighten the connection or inspect the fittings for damage. Sometimes, a worn O-ring inside the coupler can be the culprit.
Air Pressure Management
Your air compressor has a regulator. This allows you to set the output pressure for your tools. Always set the pressure according to the tool’s specifications.
Using too much pressure can damage your tools or even your work. Too little, and your tools won’t perform effectively. Always consult the tool’s manual for recommended PSI.
A good practice is to start with a lower PSI and increase it gradually until your tool functions correctly.
Your Compressor Connection Checklist
Before you power on your tools, take a moment to review this quick checklist:
- Compressor’s main power switch is OFF before connecting.
- Air hose male plug is firmly seated in the coupler.
- Coupler collar has clicked forward, securing the connection.
- No visible leaks after the compressor builds pressure.
- Output pressure is set correctly for your specific air tool.
- All other air tools are disconnected from the hose if not in use.
Troubleshooting Common Connection Issues
Sometimes, things don’t go perfectly smoothly. Don’t worry, most connection issues are easy to fix.
Hose Won’t Connect or Stay Connected
Is the hose not clicking in? Or does it pop out easily? This usually points to a compatibility issue or a worn fitting.
First, double-check that your male plug and female coupler are compatible types (Automotive vs. Industrial). Mismatched fittings will never seal correctly.
Next, inspect both the male plug and the female coupler for damage or excessive wear. A bent plug or a worn O-ring in the coupler can prevent a secure connection.
| Problem | Likely Cause | Solution |
|---|---|---|
| Hose won’t go in | Mismatched fitting types | Ensure A-style with A-style, I-style with I-style. Replace incompatible fitting. |
| Hose goes in, but doesn’t click | Worn coupler/plug, debris | Clean coupler/plug. Inspect for damage; replace if worn. |
| Hose leaks after connection | Loose connection, damaged O-ring (in coupler) | Push firmer, check for “click.” Replace coupler if O-ring is damaged. |
| Air pressure drops quickly | Significant leak, internal compressor issue | Check all connections with soapy water. If no external leaks, consult compressor manual. |
Difficulty Disconnecting the Hose
If you’re finding it hard to disconnect the hose, it’s almost always because the line is still under pressure. You need to depressurize the hose first.
First, turn off your air compressor. Then, depressurize the air line. You can do this by activating an air tool or holding down any bleed valve on the compressor until the pressure gauge reads zero.
Once the pressure is relieved, the coupler collar should slide back easily, allowing you to remove the male plug. Never force a connection or disconnection under pressure, as this can be dangerous (Occupational Safety and Health Administration guidelines).
Conclusion
Connecting your air hose to an air compressor doesn’t have to be intimidating. By understanding your fittings and following a few simple steps, you can achieve a secure, leak-free connection every time. Remember to always prioritize safety, check for leaks, and manage your air pressure appropriately. You’re now equipped with the knowledge to confidently run your air tools and tackle those projects!
Go ahead, connect that hose, and get to work!
Frequently Asked Questions
Why is my air hose not sealing properly with the compressor?
A common reason is mismatched quick-connect fitting types (Automotive vs. Industrial). They might look similar but aren’t interchangeable. Also, check for debris or wear in the coupler’s O-ring, which can prevent a tight seal.
Can I use any air hose with any compressor?
Generally, yes, as long as the fittings on your hose match the quick-connect coupler on your compressor. High-quality hoses are always recommended for durability and safety under pressure.
How do I know if my quick-connect fittings are Automotive or Industrial style?
Check the packaging of your compressor or tools, which often specifies the fitting type. You can also compare them to images online, as there are slight visual differences. Universal couplers are designed to fit both styles.
Is it normal for air to leak a little when connecting or disconnecting the hose?
A very brief hiss when connecting or disconnecting is normal as air equalizes. However, a continuous hiss after the connection is made indicates a leak that needs to be addressed.
Should I lubricate my quick-connect fittings?
You can apply a small amount of pneumatic tool oil or silicone grease to the O-rings inside the female coupler. This helps maintain the seal and makes connecting and disconnecting smoother. Just don’t overdo it.
