How To Test Air Compressor Capacitor?
You can test an air compressor capacitor using a multimeter set to capacitance mode.
This helps determine if your capacitor is failing, which often prevents your air compressor from starting or running correctly.
Here’s the straightforward scoop on testing your air compressor capacitor:
- Safety is paramount; always unplug and discharge the capacitor first.
- You’ll need a multimeter capable of measuring capacitance.
- Compare your multimeter reading to the capacitor’s label for accuracy.
- A reading significantly outside the labeled range usually means a bad capacitor.
- Replacing a faulty capacitor can often fix a non-starting air compressor.
Ever walked out to your garage, ready to tackle a project, only to find your trusty air compressor just sits there, humming but not starting? It’s a common frustration, isn’t it?
Often, the culprit behind this puzzling silence or sluggish start is a small but mighty component: the start capacitor. This little powerhouse gives your compressor motor the initial kick it needs to get going.
When it fails, your compressor can feel like it’s forgotten how to breathe. But don’t worry! Testing it yourself is totally doable, and we’re here to walk you through it.
How To Test Air Compressor Capacitor?
To test an air compressor capacitor, you will safely discharge it, remove it, and then use a multimeter to measure its capacitance, comparing the reading to its labeled value.
Safety First: Always Unplug and Discharge!
Before you even think about touching your capacitor, safety is your best friend. Seriously, this step is non-negotiable. Capacitors store electricity, even after the unit is unplugged, and they can deliver a nasty shock.
First, make sure your air compressor is completely unplugged from the wall. Then, you need to discharge the capacitor. Many experts recommend using a screwdriver with an insulated handle.
Carefully touch the metal shaft of the screwdriver across the two terminals of the capacitor. You might see a small spark or hear a pop. That’s good! It means the stored charge has been released.
Gather Your Tools: What You’ll Need
You won’t need an elaborate workshop for this task. Just a few essential items will do the trick:
- A multimeter: Make sure it has a capacitance (farad) setting. Most modern digital multimeters do.
- An insulated screwdriver: For discharging the capacitor safely.
- A pair of insulated pliers or wire cutters: To help with removal if needed.
Having the right tools makes the job much smoother and safer, as we found through various repair guides.
Step-by-Step Testing Process
Alright, let’s get down to business. Follow these steps carefully, and you’ll have your capacitor tested in no time.
Locate Your Capacitor
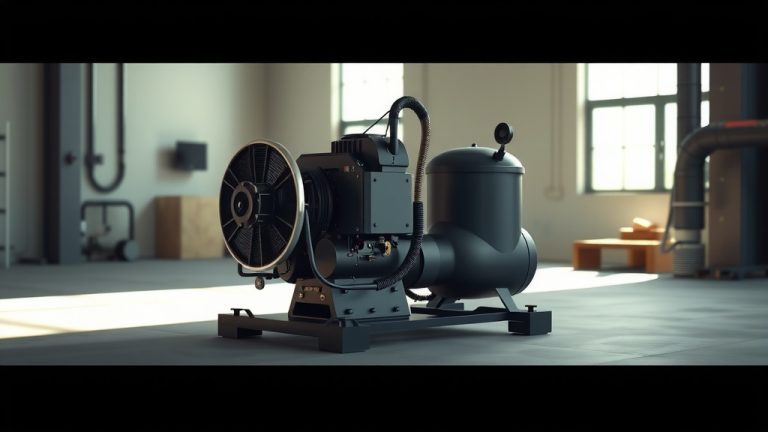
First, you need to find the capacitor. On most air compressors, it’s usually a cylindrical component, often black or silver, located near the motor. It might be covered by a protective plastic shroud or metal box.
You may need to remove a few screws to access it. Take a photo before you disconnect anything. This helps you remember where all the wires go!
Discharge the Capacitor (Again, Seriously!)
Even if you discharged it initially, it’s wise to do it again once you have direct access. It’s like checking twice before crossing the street – better safe than sorry, right?
Use your insulated screwdriver to short the terminals. This double-check confirms no residual charge remains before you handle it directly.
Remove and Inspect the Capacitor
Carefully disconnect the wires from the capacitor terminals. Pay attention to how they are connected. Then, gently remove the capacitor from its mounting bracket.
While it’s out, give it a quick visual inspection. Are there any bulges, cracks, leaks, or burn marks? These are clear signs of a failing capacitor, even before electrical testing (Electrical Safety Foundation International).
Set Your Multimeter
This is where your multimeter shines. Turn the dial to the capacitance setting, often denoted by an ‘F’ (for Farad) or a capacitor symbol (two parallel lines).
If your multimeter has different ranges (e.g., microfarads, nanofarads), select a range that is appropriate for your capacitor. Most compressor capacitors are in the microfarad (µF) range, usually between 20-80 µF.
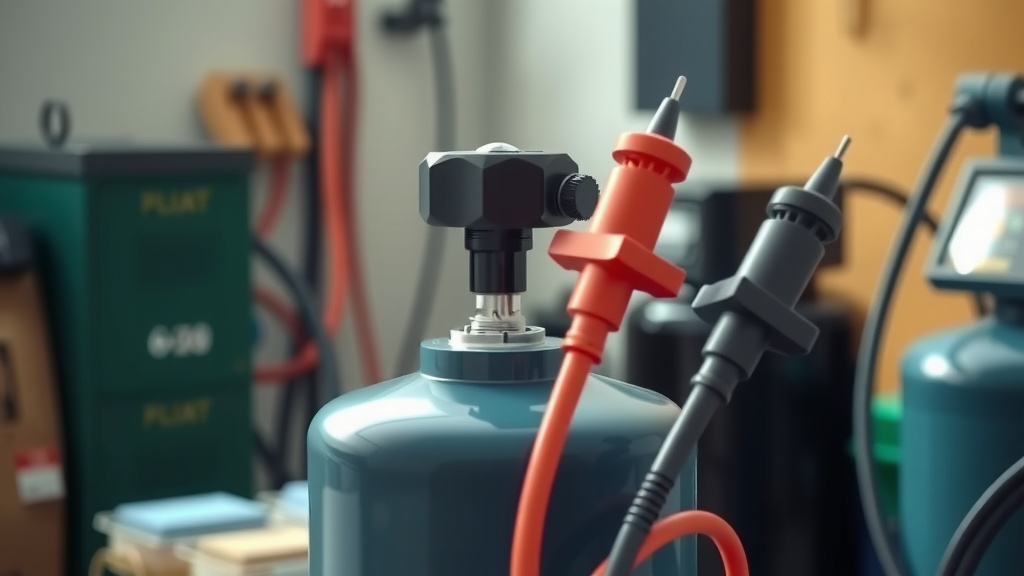
Take the Reading
Now, touch the red probe of your multimeter to one terminal of the capacitor and the black probe to the other terminal. It doesn’t matter which probe goes to which terminal for non-polarized capacitors.
The multimeter display should settle on a reading after a few seconds. This number represents the capacitance of your component.
Interpret the Results
Compare the reading on your multimeter to the value printed on the side of the capacitor. Most capacitors have a labeled microfarad (µF) value, usually with a tolerance percentage (e.g., 50 µF ± 5%).
Many experts agree that a capacitor is generally considered good if its measured value is within 5-10% of the labeled value (HVAC-R Technician Handbook). If your reading is significantly lower or higher, say more than 10-20% off, your capacitor is likely bad.
| Multimeter Reading | Capacitor Label | Condition |
|---|---|---|
| Within 5-10% of label | 50 µF ± 5% | Good (within tolerance) |
| Significantly below label | 50 µF ± 5% | Weak or Failing |
| Significantly above label | 50 µF ± 5% | Faulty (rare, but possible) |
| “OL” or zero reading | Any label | Completely Dead |
What If Your Capacitor is Bad?
If your multimeter confirms a bad capacitor, don’t despair! This is one of the easier and more affordable air compressor repairs. You’ll need to purchase a replacement capacitor with the exact same microfarad (µF) rating and voltage. Always ensure the voltage rating is equal to or higher than the original.
When Else Might a Capacitor Be the Culprit?
Besides a compressor that won’t start, a failing capacitor can show other symptoms. You might notice your compressor starts slowly, strains, or makes a loud humming noise without fully engaging. Sometimes it starts, but then struggles to build pressure. These are all clues pointing to a potentially weak capacitor (Research on Motor Starting Circuits).
Preventative Tips for Capacitor Health
While capacitors eventually wear out, you can help prolong their life. Keep your compressor in a clean, dry environment, away from excessive heat. Ensure the unit is receiving the correct voltage. Over time, heat and electrical stress are common causes of capacitor failure.
Common Mistakes to Avoid
As you tackle this, keep these pitfalls in mind:
- Forgetting to discharge: We can’t stress this enough.
- Wrong multimeter setting: Using ohms instead of capacitance will give you an incorrect reading.
- Ignoring visual cues: A swollen capacitor is almost always a bad capacitor.
- Not matching ratings: Always replace with a capacitor that has identical µF and equal or higher voltage.
Your Air Compressor Capacitor Checklist
Here’s a quick checklist to guide you through the process:
- Unplug the compressor.
- Locate the capacitor.
- Discharge the capacitor safely.
- Remove the capacitor.
- Inspect for visual damage.
- Set multimeter to capacitance (µF) mode.
- Touch probes to capacitor terminals.
- Read and compare to labeled value.
- Decide if replacement is needed.
Troubleshooting Other Compressor Issues
If your capacitor tests fine, but your compressor still isn’t working, the issue might lie elsewhere. It could be a faulty pressure switch, a damaged motor, a tripped breaker, or even a problem with the check valve. Always approach troubleshooting systematically, ruling out one component at a time.
Conclusion
Testing your air compressor capacitor might seem daunting at first, but with the right tools and a careful, step-by-step approach, it’s a very manageable task. By prioritizing safety, accurately reading your multimeter, and knowing how to interpret the results, you can diagnose a common problem and potentially save yourself the cost of a professional repair.
Remember, a little attention to your tools goes a long way in keeping your projects running smoothly. You’ve got this!
Can a bad capacitor cause an air compressor to hum but not start?
Yes, absolutely. A common symptom of a failing capacitor is a compressor motor that hums loudly but fails to spin up and start. The capacitor provides the initial burst of power needed to get the motor rotating, and without it, the motor lacks the torque to begin operation.
How do I safely discharge an air compressor capacitor?
To safely discharge a capacitor, first ensure the air compressor is unplugged. Then, use an insulated screwdriver by touching the metal shaft across both capacitor terminals simultaneously. You might see a spark or hear a pop as the stored energy is released. Always wear safety glasses.
What multimeter setting should I use to test a capacitor?
You should use the capacitance setting on your multimeter, which is typically indicated by a symbol of two parallel lines or the letter ‘F’ for Farads (µF, nF, pF). Make sure to select a range appropriate for the capacitor’s labeled microfarad (µF) value.
What is a normal tolerance range for air compressor capacitor readings?
A normal tolerance range for an air compressor capacitor is usually within 5% to 10% of its labeled microfarad (µF) value. For example, a 50 µF capacitor should ideally read between 45 µF and 55 µF. Readings outside this range often indicate a failing capacitor.
Can I replace an air compressor capacitor with a different µF rating?
No, you should always replace an air compressor capacitor with one that has the exact same microfarad (µF) rating. Using a capacitor with a different µF rating can cause incorrect motor operation, overheating, and potential damage to your compressor motor over time.