How To Use Kobalt 6 Gallon Air Compressor?
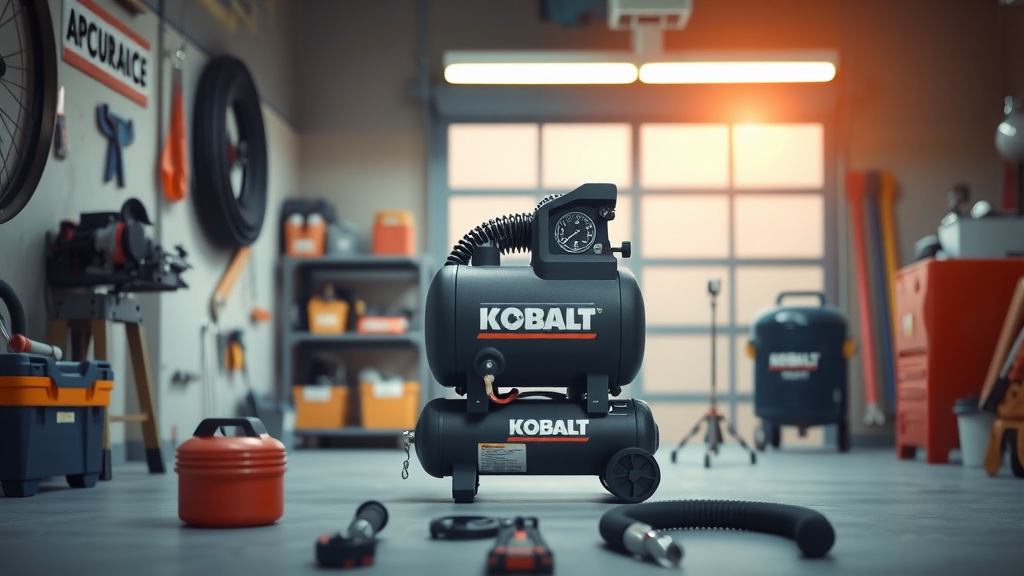
To use your Kobalt 6 Gallon Air Compressor, first ensure it’s on a level surface and plugged into a grounded outlet. Next, attach your air hose and preferred tool, set the desired pressure using the regulator, and always wear appropriate safety gear before operating.
This portable compressor is excellent for common DIY tasks like inflating tires or operating small pneumatic tools once you understand its basic controls and safety features.
TL;DR: Quick Guide to Your Kobalt 6 Gallon Air Compressor
- Setup Smart: Place on a level surface and plug into a grounded outlet.
- Safety First: Always wear eye and ear protection before starting.
- Connect Right: Attach the air hose and your tool securely to the quick-connect coupler.
- Adjust Pressure: Use the regulator knob to set the working air pressure needed for your task.
- Drain After Use: Release air and drain moisture from the tank regularly to extend compressor life.
How To Use Kobalt 6 Gallon Air Compressor?
Using your Kobalt 6-gallon air compressor involves a few simple steps. You’ll prepare it for operation, connect your tools, set the correct air pressure, and then tackle your project safely and efficiently. This guide will walk you through everything.
Getting Started: Your First Steps with the Compressor
Getting your new Kobalt compressor ready is quite easy. Think of it as preparing a new friend for adventure. It just needs a little bit of care and attention from the start.
Unboxing and Initial Checks
When you first unbox your compressor, take a moment to look around. Check for any shipping damage or loose parts. We found that a quick visual inspection can prevent headaches later. Make sure everything feels secure and sturdy.
Read through the owner’s manual, even just for a quick skim. It contains specific details for your model. Manufacturers like Kobalt put a lot of helpful information in there for a reason.
Finding the Perfect Spot
Always ensure your Kobalt 6-gallon compressor is placed on a stable, level surface. This helps prevent it from tipping over, which could be dangerous. Also, pick a spot with good airflow around the unit to prevent overheating.
The compressor needs to be near a grounded electrical outlet. It’s a powerful machine, so don’t use extension cords unless absolutely necessary and they are rated for the compressor’s power needs.
Safety First: Protecting Yourself
Before you even think about plugging in your compressor, let’s talk safety. You wouldn’t drive a car without a seatbelt, right? The same logic applies here. Your safety is paramount.
Essential Personal Protective Equipment (PPE)
Always, and we mean always, wear safety glasses or goggles. Research often connects projectile injuries with compressor use (OSHA safety guidelines). Air tools can kick up debris at high speeds.
Ear protection, like earmuffs or earplugs, is also a must. Air compressors can be noisy, and prolonged exposure to loud sounds can damage your hearing (NIH studies show this). Protect your ears!
Ventilation Matters
Operate your compressor in a well-ventilated area. Compressors generate heat and can sometimes emit fumes. Proper airflow helps dissipate heat and ensures you’re not breathing in anything unpleasant.
Avoid using it in damp or wet conditions. Electricity and water are never a good mix. Keep your work area dry and clear of clutter.
Connecting Your Tools: Air Hoses and Attachments
This is where the magic happens – bringing power to your tools! It’s like connecting a lifeline from the compressor to your project. You’ll appreciate the simple design here.
Choosing the Right Air Hose
For a 6-gallon compressor, a 3/8-inch diameter air hose is generally a good choice. It offers a good balance of airflow for most common DIY tools without being too bulky. Shorter hoses also lose less pressure.
Make sure your hose is rated for the maximum pressure of your compressor. We found that a hose with at least a 200 PSI rating is often suitable (based on common compressor specifications).
Mastering Quick-Connect Couplers
Your Kobalt compressor likely has a quick-connect coupler. This handy device lets you easily attach and detach air tools. Simply pull back the collar, insert the tool’s plug, and release the collar to secure it. Give it a gentle tug to confirm it’s locked.
Operating the Controls: Powering Your Projects
Now that everything is connected, it’s time to take control. Understanding the gauges and regulator is key to getting the right power for your task.
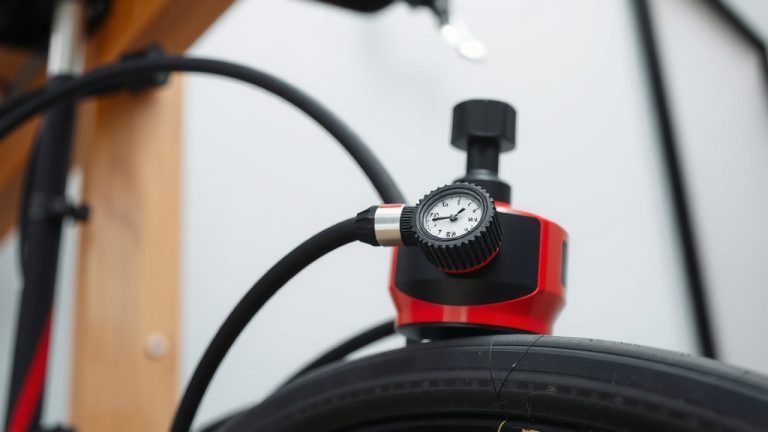
Understanding the Gauges
Your Kobalt compressor typically has two gauges. One shows the tank pressure, which is the total air stored in the tank. The other displays the regulated output pressure, which is the air pressure going to your tool. Keep an eye on both.
Adjusting the Air Regulator
The regulator knob is your best friend for precise work. Turn it clockwise to increase the output pressure and counter-clockwise to decrease it. Always check your tool’s pressure requirements; many experts say this is crucial for tool longevity and safety (tool manufacturer guides).
Start with a lower pressure and gradually increase it. This prevents overpowering delicate tools or materials. It’s always better to add more air than to deal with too much.
Pre-Operation Checklist for Your Kobalt Compressor
- Safety glasses and ear protection on?
- Compressor on a stable, level surface?
- Hose and tool securely connected?
- Drain valve closed tight?
- Power cord plugged into a grounded outlet?
Common Projects for Your 6-Gallon Compressor
A 6-gallon Kobalt compressor is a versatile little powerhouse for many home and garage tasks. What will you create or fix today?
Inflating Tires and Sports Equipment
This is perhaps one of the most common uses. Whether it’s your car tires, bicycle tires, or a deflated basketball, your compressor can handle it. Just attach the appropriate inflation nozzle and set the pressure carefully.
Powering Pneumatic Nailers and Staplers
For trim work, small framing projects, or upholstery, a nailer or stapler is invaluable. Your 6-gallon unit can keep up with intermittent use. Many experts recommend checking the tool’s CFM requirement against your compressor’s output.
| Common Air Tool | Approximate CFM @ 90 PSI | Suitable for Kobalt 6-Gallon? |
|---|---|---|
| Tire Inflator | 1-2 CFM | Yes |
| Brad Nailer | 0.5-1 CFM | Yes |
| Finish Nailer | 1-2 CFM | Yes |
| Blow Gun | 2-5 CFM | Yes |
| Impact Wrench (light) | 3-5 CFM | Limited Use |
Quick Dusting and Cleaning Jobs
Attach a blow gun, and suddenly you have a powerful duster. It’s great for clearing sawdust from your workbench, blowing off car parts, or cleaning hard-to-reach areas. Just remember those safety glasses!
Keeping Your Compressor Healthy: Basic Maintenance
A little care goes a long way in extending the life of your compressor. Think of it as giving your friend a healthy check-up.
Draining Moisture from the Tank
This is probably the single most important maintenance step. Air compressors introduce moisture into the tank, which can cause rust. After each use, or at least weekly, open the drain valve at the bottom of the tank to release any collected water. We found that neglecting this can severely shorten your compressor’s life (based on manufacturers’ warnings).
Checking the Air Filter
The air filter prevents dust and debris from entering the compressor’s pump. Periodically inspect it for dirt. If it’s very dirty, you might need to clean or replace it. A clean filter helps your compressor run more efficiently.
Troubleshooting Minor Issues
Even the best tools can have a grumpy day. Here are a couple of common things you might encounter.
What if the Compressor Won’t Start?
First, check the power connection. Is it securely plugged in? Is the circuit breaker tripped? Sometimes, if the motor overheats, it has a thermal overload switch that will trip. Let it cool down, then try resetting it. Many experts say this is a common occurrence on hot days (compressor forums and user guides).
Dealing with Air Leaks
Hear a hiss? You likely have an air leak. Check all connections – hoses, couplers, and the drain valve. Tighten anything loose. You can even spray a little soapy water on connections; bubbles will pinpoint the leak. Repairing small leaks improves efficiency.
Conclusion
Your Kobalt 6-gallon air compressor is a fantastic tool that opens up a world of DIY possibilities. By following these simple steps for setup, safe operation, and basic maintenance, you’ll be well on your way to tackling projects with confidence. Remember, a little care and understanding ensure your compressor serves you reliably for years to come. Now go make something awesome!
FAQs About Using Your Kobalt 6 Gallon Air Compressor
How much air pressure (PSI) should I use for inflating car tires with my Kobalt 6-gallon compressor?
Always refer to the recommended PSI listed on your vehicle’s tire sidewall or in the owner’s manual. Most passenger car tires typically require between 30-35 PSI, but always check your specific tire’s requirement.
Can I use an impact wrench with my Kobalt 6-gallon air compressor?
You can use an impact wrench for light, intermittent tasks like removing lug nuts. However, the 6-gallon tank and its CFM output are generally not sufficient for continuous heavy-duty use with high-demand tools like larger impact wrenches, as the compressor will run constantly to keep up.
How often should I drain the water from the tank of my Kobalt 6-gallon air compressor?
It’s best practice to drain the water from your compressor’s tank after every single use, especially if you live in a humid environment or have used the compressor for an extended period. This prevents rust buildup and extends the life of the tank.
What kind of oil does my Kobalt 6-gallon air compressor need?
Most Kobalt 6-gallon air compressors are “oil-free” models, meaning they do not require any oil for the pump. Always check your specific model’s manual to confirm, as adding oil to an oil-free compressor can cause damage.
My compressor cycles on and off frequently, even when I’m not using it. Is this normal?
Frequent cycling when idle often indicates a small air leak somewhere in the system. Check all connections, hoses, and the tank drain valve. A pressure switch might also be faulty, but leaks are the more common culprit. Address leaks promptly to save electricity and prevent compressor wear.