How To Use Senco Air Compressor?
To use a Senco air compressor, you first connect it to a power source, attach the air hose, and then select the right tool for your project. Always prioritize safety gear before starting any task with your Senco air compressor.
You will need to adjust the air pressure on your Senco air compressor based on the tool and material you are working with for optimal performance. Checking for leaks and draining moisture are also part of proper operation and maintenance.
Here’s a quick overview of how to get the most from your Senco air compressor:
- Start by plugging in and powering on your compressor.
- Connect your air hose and chosen pneumatic tool.
- Adjust the pressure for your specific task, like nailing or stapling.
- Always wear safety glasses and hearing protection.
- Regularly check for leaks and drain any accumulated water.
How To Use Senco Air Compressor?
Using a Senco air compressor involves a few simple steps to get you up and running safely and efficiently. The goal is always to match your tool to the job and your pressure to the tool. Think of it like tuning a guitar; each string needs the right tension to sound good, and each air tool needs the right pressure to work best.
Safety First: Your Most Important Step
Before you even plug in your Senco air compressor, put on your safety gear. We found that personal protective equipment (PPE) is not just a suggestion, it’s a must. You really want to protect your eyes with safety glasses and your ears with earplugs or muffs. Sometimes, gloves are a good idea too, especially if you’re handling materials that might splinter or pinch (OSHA guidelines suggest this).
Checking Your Workspace
Is your work area clear? Do you have enough light? Make sure there are no trip hazards around your compressor or air hose. A clean workspace makes for a safer and more enjoyable experience. It’s like having a tidy kitchen before you start cooking; everything just goes smoother.
Setting Up Your Senco Air Compressor
Okay, let’s get down to business. Setting up your compressor is easier than you might think. We will walk you through each part.
Finding the Right Power Source
Your Senco air compressor needs power. Look for a grounded electrical outlet. Many experts say it’s best to use an extension cord that is rated for outdoor use and matches the compressor’s amperage requirements. An undersized cord can cause issues, like overheating.
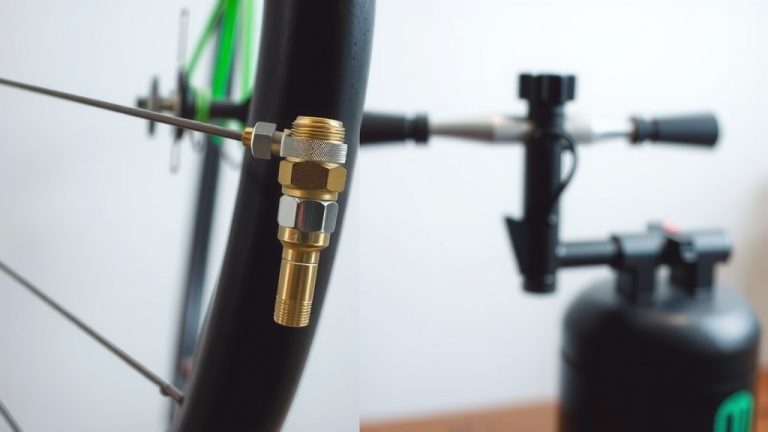
Connecting the Air Hose
This is where the magic starts. Your air hose will connect to the compressor’s air outlet. Most Senco models use a quick-connect coupler, which makes attaching the hose very simple. Just push the fitting into the coupler until it clicks. Give it a gentle tug to ensure it’s secure.
Attaching Your Pneumatic Tool
With the hose connected, it’s time for your tool. Whether it’s a nailer, stapler, or paint sprayer, it will also have a quick-connect fitting. Just like with the hose, push it into the coupler at the end of your air hose. Listen for that reassuring click. Double-check it’s locked in place before moving on.
Powering On Your Compressor
Ready? Flip the power switch to the ‘ON’ position. You’ll hear the motor hum to life. The compressor will start building pressure in its tank. It will run until it reaches its maximum pressure, then shut off automatically. This is completely normal and means the compressor is working correctly.
Adjusting Air Pressure (PSI)
This is a critical step for quality work. Your Senco air compressor will have a regulator knob, usually near the pressure gauges. Turn this knob to adjust the outgoing air pressure (PSI). Your tool’s manual or even the nail box often lists the recommended operating pressure. Too little pressure, and your nails won’t sink properly. Too much, and you might damage your material or tool.
| Tool Type | Recommended PSI Range | Common Use |
|---|---|---|
| Finish Nailer | 70-90 PSI | Trim, molding, cabinetry |
| Framing Nailer | 90-120 PSI | Construction framing, decking |
| Brad Nailer | 60-80 PSI | Small trim, crafts |
| Stapler | 70-100 PSI | Upholstery, sheathing |
| Impact Wrench | 90-100 PSI | Automotive, heavy assembly |
Testing Your Tool
Before working on your actual project, always do a test run on a scrap piece of material. This helps you confirm the pressure setting. Is the nail setting flush? Is the staple going in deep enough? Adjust your PSI slightly until you get the perfect result you are looking for.
Working with Your Senco Compressor
Now that everything is set, you can start your project. Hold your tool firmly and follow its specific instructions for use. Remember that the compressor will kick on periodically to refill the tank as you use air. This is just it doing its job quietly and efficiently.
Draining Moisture: A Key Maintenance Step
After each use, or at least regularly, you need to drain the moisture from your compressor’s tank. Water accumulates inside due to condensation. If you don’t drain it, it can lead to rust inside the tank and potentially damage your tools. Look for a drain valve at the bottom of the tank. Simply open it until all the water is out, then close it tightly.
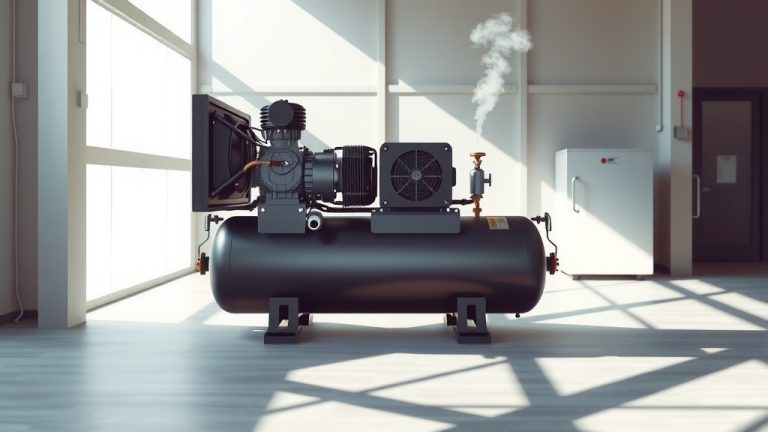
Storing Your Compressor
Once you are done, unplug the compressor and coil up your air hose neatly. Store your Senco air compressor in a clean, dry place. This helps extend its lifespan and keeps it ready for your next project.
Essential Checklist for Every Use
- Wear safety glasses and hearing protection.
- Check air hose for wear or damage.
- Ensure quick-connect fittings are secure.
- Verify pressure setting matches your tool.
- Conduct a test fire on scrap material.
- Drain tank moisture after each use.
Conclusion
Using your Senco air compressor is a straightforward process when you know the steps. From initial setup and safety checks to pressure adjustment and proper storage, each part plays a role in successful operation. By following these guidelines, you ensure both your safety and the longevity of your equipment. A well-maintained compressor is a happy compressor and a productive tool for any project you tackle.
What is the ideal pressure for a Senco finish nailer?
The ideal pressure for a Senco finish nailer typically ranges between 70 and 90 PSI. You might adjust this slightly based on the wood hardness and the desired nail depth, often found in your tool’s manual.
How often should I drain the water from my Senco air compressor?
You should drain the water from your Senco air compressor after every use, especially in humid environments. This prevents rust buildup inside the tank and helps prolong the compressor’s life.
Can I use any air tool with my Senco compressor?
Generally, most standard pneumatic air tools are compatible with Senco compressors, as they use common quick-connect fittings. Always check the tool’s air consumption (CFM) and required PSI against your compressor’s output capabilities.
What kind of extension cord should I use with my air compressor?
When using an extension cord, we found it should be rated for outdoor use, be three-pronged (grounded), and have a gauge (thickness) appropriate for the compressor’s amperage and cord length. A thicker gauge (lower number) is better for longer cords to prevent voltage drops.
My Senco compressor isn’t building pressure, what could be wrong?
If your Senco compressor isn’t building pressure, check for common issues like a loose hose connection, an open drain valve, a leaky tank, or a faulty pressure switch. Sometimes, simply ensuring all valves are closed solves the problem.