
How to Plumb Air Lines in a Garage?

Plumbing air lines in your garage is a smart move for efficiency. It means you can easily use air tools anywhere. You’ll need a reliable compressed air system. This will boost your garage’s productivity. Getting it right saves you hassle later.
A well-planned air line setup is key. Think about the best materials for your needs. Consider the layout to avoid leaks. Proper installation ensures consistent air pressure. This makes all your air-powered tools work better. It’s an investment that pays off.
- Plan your air line layout carefully.
- Choose the right tubing and fittings.
- Mounting the compressor and tank is important.
- Connect your lines securely to prevent leaks.
- Test your system thoroughly before heavy use.
Let’s walk through how to plumb your garage air lines step by step. We’ll cover everything you need to get started.
Setting Up Your Garage Air Line System
Plumbing air lines in your garage is a fantastic way to boost your workshop’s efficiency. You’ll get air power right where you need it. This means no more wrestling with long hoses or moving your compressor. It makes using air tools much easier and more productive.
The goal is a reliable compressed air system. This setup should deliver consistent air pressure to all your tools. Getting the plumbing right is key. It prevents leaks and ensures your tools perform at their best. Think of it as a smart investment for your garage. A loose fitting is a leak waiting to happen, which increases your electricity bill.
Planning Your Air Line Layout
Before you buy any pipe or fittings, grab a notepad and sketch it out. Where is your air compressor going to live? How many tools will you use, and where? Consider the best path for your air lines. You want them out of the way but accessible.
Think about future needs too. Might you add more tools or workstations later? Designing with expansion in mind saves you headaches down the road. It’s better to run a little extra pipe now than to redo everything later.
Choosing the Right Tubing Material
When it comes to air lines, you have a few main choices. The most common materials are PEX, copper, and black iron pipe. Each has its pros and cons for a garage setup.
PEX Tubing
PEX tubing is a flexible plastic pipe. It’s relatively easy to install. You can bend it around corners without special fittings. This can speed up your installation. It’s also less prone to freezing than metal pipes. However, it might not be the best choice for very high-pressure applications or if you plan to run it in extremely hot areas. Many plumbers use PEX for its ease of use (Plumbing & HVAC). For a typical garage, it’s a solid contender.
Copper Tubing
Copper has been a long-time favorite for plumbing. It’s durable and resistant to corrosion. Copper can handle high temperatures and pressures well. The downside? It’s more expensive than PEX. It also requires more skill to install. You’ll need to solder or use compression fittings, which can be tricky for beginners. If you’re comfortable with soldering, copper is a very reliable option.
Black Iron Pipe
Black iron pipe is tough and can handle high pressure. It’s often used in industrial settings. For a garage, it’s a very robust choice. It’s also quite affordable. The biggest drawback is rust. If moisture gets into the lines, black iron can rust over time. This can lead to leaks or contamination of your air supply. Installation involves threading pipes, which requires specific tools and some practice. Many DIYers find it a bit more labor-intensive than PEX.
Deciding on Tubing Size
The size of your air lines matters. It affects air flow and pressure drop. Too small a pipe, and your tools won’t get enough air. Too large, and you might waste material. For most home garages, 1/2-inch or 3/4-inch tubing is a good starting point. This size usually offers a good balance between flow and cost.
Consider the length of your runs. Longer runs might benefit from a slightly larger diameter. This helps to maintain adequate pressure. You can always check the manufacturer’s recommendations for your compressor and tools. They often provide guidance on optimal line sizing.
Compressor and Tank Placement
Your air compressor and storage tank are the heart of your system. Where you put them makes a big difference. A good location ensures easy access for maintenance and operation. It also helps with noise reduction.
Ideally, place your compressor in a well-ventilated area. Compressors generate heat. Good airflow helps them run cooler and last longer. Also, try to place it away from your main workbench. The noise can be distracting. Some people put their compressor in a separate shed or an attached garage area.
Mounting the tank securely is also important. A large tank helps smooth out air delivery. It also reduces how often the compressor has to cycle on. Use sturdy brackets or a dedicated stand. Ensure it’s stable and won’t vibrate excessively.
Installing Your Air Lines
Now for the hands-on part! Laying out your tubing is the next step. If you’re using PEX, unroll it carefully. Avoid kinks. If you’re using rigid pipe, plan your cuts and connections.
Connecting Fittings and Tubing
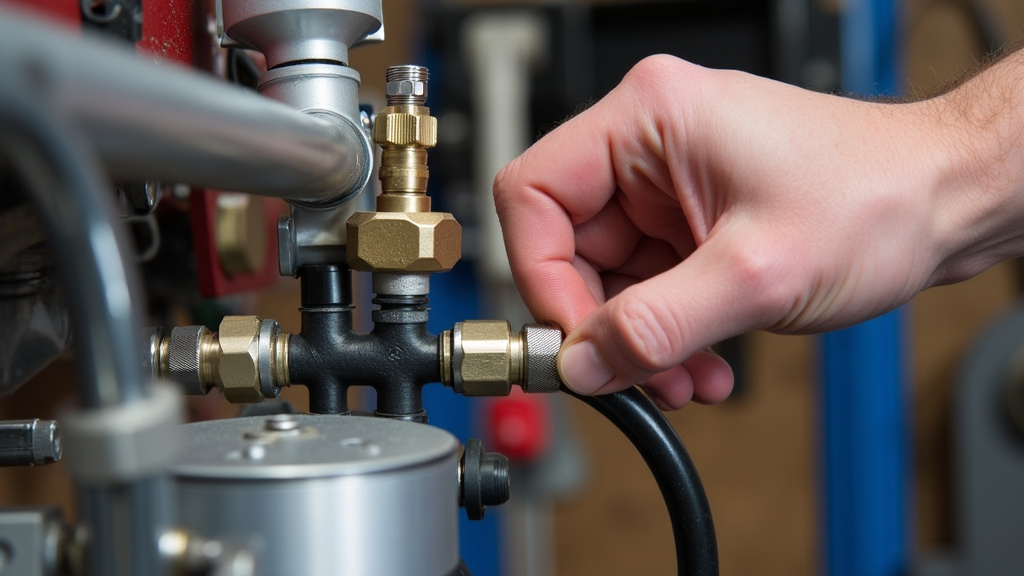
The type of fittings you use depends on your tubing material. For PEX, you’ll use crimp or push-to-connect fittings. Push-to-connect fittings are very user-friendly. You just push the pipe in, and it locks. For copper, you might solder or use compression fittings. Black iron pipe uses threaded fittings.
Make sure all connections are tight and leak-free. A loose fitting is a leak waiting to happen. Leaks waste energy and reduce your air pressure. We found that even small leaks can add up over time. This increases your electricity bill.
Running Lines and Branching Out
Run your main line from the tank. Then, decide where you need air outlets. You can install quick-connect fittings at strategic points. This allows you to easily attach your air hoses.
Consider installing a moisture separator. Water can build up in compressed air lines. A separator helps remove it. This is especially important if you paint or use delicate air tools. Many experts recommend some form of water management for any air system (ASHRAE).
You might also want to install a regulator at each outlet or at the tank. Regulators control the air pressure. Different tools require different pressures. A regulator ensures you’re not over-pressurizing your tools. This can damage them. It also helps ensure consistent performance.
Best Practices for a Tight System
Here’s a quick checklist of things to keep in mind:
- Plan your route carefully to minimize turns.
- Use the correct size tubing for your needs.
- Secure all connections to prevent leaks.
- Install a moisture trap to protect your tools.
- Use regulators for consistent air pressure.
- Test for leaks after everything is connected.
Testing Your New Air Line System
Once everything is installed, it’s time for the moment of truth: testing! First, double-check all your connections. Make sure they are snug. Slowly turn on the air supply from your compressor.
Listen carefully for any hissing sounds. Hissing is usually a sign of a leak somewhere. You can use a soapy water solution. Spray it on all your fittings and connections. Bubbles will appear where there are leaks. If you find any, turn off the air and tighten or fix the connection.
After you’ve fixed any leaks, turn the air back on. Let the tank fill up. Then, try connecting a tool. Does it have enough air pressure? Does it operate as expected? If everything feels right, congratulations! You’ve successfully plumbed your garage air lines.
This system will make working in your garage so much more enjoyable. You’ll have the power you need, right where you need it. Enjoy the convenience!
Conclusion
You’ve now learned the essentials of plumbing air lines in your garage. From planning your layout to choosing materials and testing for leaks, you’re ready to build a system that works for you. A well-installed air line setup means your tools will perform better. It also makes your garage workflow much smoother and more efficient. Don’t delay—take the first step today by sketching out your ideal air line path. Your future self will thank you for the convenience and power it provides.
Frequently Asked Questions
What’s the best tubing material for a DIY garage air line system?
For most DIYers, PEX tubing is a great choice. It’s flexible, easier to install, and more affordable than copper or iron pipe. Many found it the quickest to set up without specialized tools.
How do I determine the right size for my air lines?
A good rule of thumb for home garages is to use 1/2-inch or 3/4-inch tubing. This size usually balances good airflow with cost. Consider longer runs might benefit from slightly larger diameter pipe.
Should I install moisture traps or regulators?
Yes, installing moisture traps and regulators is highly recommended. Traps protect your tools from water damage, and regulators ensure consistent, safe air pressure for optimal tool performance.
How can I check for leaks after installation?
The easiest way to check for leaks is to use soapy water. Spray it on all your connections and fittings after pressurizing the system. Any leaks will show up as bubbles.
Is black iron pipe a good option for a garage?
Black iron pipe is very durable and can handle high pressure. However, it is prone to rust if moisture is present, which can affect air quality and lead to leaks over time.
