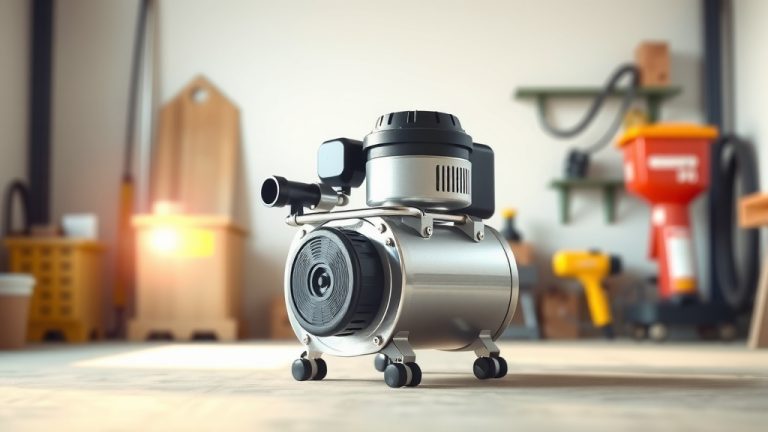
How To Use Campbell Hausfeld 2 Gallon Air Compressor?

To use your Campbell Hausfeld 2-gallon air compressor, first ensure it’s on a stable, level surface, then connect your air hose and chosen pneumatic tool securely. Always set the pressure regulator to your tool’s required PSI before starting work.
Proper usage of the Campbell Hausfeld 2-gallon air compressor involves understanding its components, prioritizing safety, and performing routine maintenance like draining the tank. This ensures efficient and long-lasting performance for various home and workshop tasks.
TL;DR: Ready to power up your projects? Here’s the quick guide to your Campbell Hausfeld compressor:
- Set up on a flat surface, always checking for damage.
- Prioritize safety with eye protection and good ventilation.
- Plug it in, connect your air hose and specific tools.
- Adjust the pressure regulator to match your tool’s needs.
- Perform routine tank draining to prevent internal rust.
How To Use Campbell Hausfeld 2 Gallon Air Compressor?
Using your Campbell Hausfeld 2-gallon air compressor is a straightforward process once you understand the basic steps and safety protocols. This compact unit is ideal for many common household and DIY tasks.
You can quickly inflate tires, power small nail guns, or even perform light painting jobs. We found that proper setup and careful pressure management are key to success (Campbell Hausfeld user manual).
Getting Started: Unboxing Your Compressor
When you first get your Campbell Hausfeld 2-gallon compressor, find a good spot for it. Choose a stable, level surface to prevent tipping during operation. Is your workspace clear of clutter? This makes everything safer.
Before plugging it in, always give the unit a quick visual check. Look for any visible damage or loose parts from shipping. Many experts say a quick inspection can prevent future headaches.
Essential Safety First
Safety is not something to skip when working with compressed air. Always wear ANSI-approved eye protection, like safety glasses. Air compressors generate significant force.
Ensure your work area is well-ventilated, especially if you’re using spray paints or lubricants. Good airflow helps disperse any fumes. Think of it like cooking; you want to clear the air.
Powering Up Your Unit
Now, let’s get some power to your compressor. Plug the unit into a grounded electrical outlet. Check your compressor’s label for specific voltage requirements, typically 120V for home models.
Once plugged in, locate the on/off switch, usually a red toggle. Flip it to the “on” position. You’ll hear the motor kick on and start building air pressure; this is completely normal.
Understanding the Controls
Your Campbell Hausfeld compressor has a few key controls. You’ll see a pressure gauge, which shows the internal tank pressure. There’s also a regulator knob; this controls the *output* air pressure to your tools.
Familiarize yourself with these parts before connecting any tools. Knowing what each dial does puts you in control. It’s like learning the dashboard of a new car.
Connecting Your Air Hose and Tools
This is where the magic happens! Connect your air hose to the compressor’s air outlet using a quick-connect coupler. Ensure it’s a snug and secure fit. A loose connection means air leaks.
Next, attach your pneumatic tool to the other end of the air hose. Again, check that the connection is solid. Different tools might need different types of couplers, so be sure they match.
Inflating Tires
Inflating tires is one of the most common uses. Connect a tire inflator tool to your hose. Check your tire’s sidewall for the recommended PSI (pounds per square inch). Adjust the compressor’s regulator to this setting.
Fill the tire in short bursts, checking the pressure often with a separate tire gauge. Over-inflating can be dangerous. Research often connects proper tire pressure with vehicle safety (NHTSA).
Using for Brad Nailing
For small framing or trim work, a brad nailer is excellent. Most brad nailers need between 70-90 PSI. Set your regulator within this range. Always test on scrap wood first.
Be sure your nailer is unloaded before connecting to the air hose. Safety mechanisms are important. Many experts stress the importance of understanding your tool’s specific pressure needs.
Light Painting Tasks
For touch-ups or craft projects, a small airbrush or paint sprayer can work. These tools often require lower PSI, maybe 20-50 PSI. Check your paint gun’s instructions carefully.
Practice your spray pattern on cardboard first. This helps you get an even coat without drips. Using the right air pressure makes a huge difference in finish quality.
Setting the Right Pressure (PSI)
The regulator knob is your best friend for precise work. Each pneumatic tool has an ideal operating pressure. We found that running a tool at too low or too high a PSI can lead to poor results or even damage.
Turn the knob clockwise to increase pressure and counter-clockwise to decrease it. Always check the tool’s manual for its specific PSI requirements. Here’s a quick guide:
| Tool Type | Typical PSI Range |
|---|---|
| Tire Inflators | 20-100 PSI (vehicle specific) |
| Brad Nailers | 70-90 PSI |
| Airbrushes / Light Sprayers | 20-50 PSI |
| Blow Guns | 30-60 PSI |
Compressor Maintenance Tips
Like any valuable tool, your compressor needs a little love. Regular maintenance extends its life and ensures it runs efficiently. One crucial task is draining the air tank.
You should do this after every use, or at least regularly. This prevents rust inside the tank. Other tasks include checking the air filter and cleaning the exterior occasionally.
Why Drain Your Tank?
When an air compressor runs, moisture from the air collects inside the tank. This condensation can cause rust and corrosion over time. Rust weakens the tank walls, posing a safety risk.
Draining the tank involves opening a small valve at the bottom of the tank. This releases the accumulated water. It’s a simple step that makes a big difference.
Troubleshooting Common Issues
Sometimes things don’t go as planned, right? If your compressor isn’t building pressure, check for air leaks at connections. A hiss means a leak. Tighten fittings or replace seals as needed.
If the motor isn’t starting, check the power cord and outlet. Is the circuit breaker tripped? Sometimes, the compressor might be too hot and needs a cool-down period. Research shows that overheating can trigger thermal overload protection (OSHA guidelines).
When to Seek Professional Help
While many issues are simple fixes, some problems need a professional. If you hear unusual noises, smell burning, or the pressure gauge isn’t working correctly, it’s best to consult a qualified technician.
Don’t try to fix internal motor or tank issues yourself. Your safety is paramount. When in doubt, call the experts. Think of it like your car’s engine; some things you just don’t DIY.
Conclusion
Using your Campbell Hausfeld 2-gallon air compressor opens up a world of DIY possibilities. By following these steps—from proper setup and safety to understanding controls and routine maintenance—you ensure a safe and effective experience.
Remember to always match the air pressure to your specific tool and drain the tank after each use. With a little care, your compact compressor will be a reliable workhorse for years to come. What project will you tackle first?
How do I properly store my Campbell Hausfeld 2-gallon air compressor?
Always store your compressor in a clean, dry area away from direct sunlight and extreme temperatures. Ensure the tank is fully drained of moisture, the power cord is neatly wrapped, and any hoses or tools are disconnected and stored separately. Keeping it clean and dry prevents rust and prolongs its life.
Can I use an extension cord with my air compressor?
While generally not recommended, if an extension cord is necessary, you must use a heavy-duty, grounded cord rated for outdoor use. It should have a gauge suitable for the compressor’s amperage requirements (e.g., 12-gauge or heavier for longer cords) to prevent voltage drop and motor damage. Always keep the cord as short as possible.
What kind of oil does a Campbell Hausfeld 2-gallon air compressor use?
The Campbell Hausfeld 2-gallon air compressor is typically an oil-free model, meaning it does not require lubrication of the pump. This simplifies maintenance. Always refer to your specific model’s user manual to confirm if it is oil-free or requires a specific type of compressor oil, should it be an oiled unit.
How often should I drain the water from the air tank?
It is strongly recommended to drain the water from your air compressor’s tank after every use. Condensation builds up rapidly, and regular draining prevents internal rust and corrosion, which can compromise the tank’s integrity and safety. If you use it briefly, at least drain it at the end of your work session.
My air compressor runs constantly; is this normal?
A compressor running constantly usually indicates an air leak somewhere in the system, either in the tank, connections, hose, or tool. It could also mean the pressure switch is faulty and not shutting off the motor when the tank reaches full pressure. Check all connections for leaks or consult the manual for troubleshooting the pressure switch.