How to Hook Up Multiple Air Tools to One Compressor?
On this page (8 sections)
- Maximizing Your Air Compressor: Hooking Up Multiple Tools
- Understanding Your Compressor’s Air Delivery: CFM is King
- The Importance of Proper Air Hoses and Fittings
- The Power of a Manifold: Distributing Your Air Supply
- Setting Up Your Multi-Tool System: A Step-by-Step Checklist
- Troubleshooting Common Issues
- Conclusion
- Frequently Asked Questions
Yes, you can absolutely hook up multiple air tools to one air compressor, but it’s important to do it the right way. Doing so requires understanding your compressor’s air delivery capabilities and using the correct fittings. This setup can significantly boost your workshop efficiency.
Many DIYers and professionals alike wonder how to maximize their compressed air setup. Connecting more than one tool at a time means less waiting and more doing. We found that with a few key components, you can easily run two or even more tools simultaneously, as long as your compressor can keep up with the demand. This requires careful consideration of air flow and pressure.
- Know your compressor’s CFM rating.
- Use the right air hose size and length.
- Consider a manifold for multiple connections.
- Always check tool air requirements.
- Don’t exceed your compressor’s capacity.
Let’s walk through exactly how you can safely and effectively connect multiple air tools to your single compressor. We’ll cover the essential parts and considerations to get you up and running.
Maximizing Your Air Compressor: Hooking Up Multiple Tools
Yes, you absolutely can run multiple air tools off a single compressor. It’s a common setup that can make your projects much more efficient. You just need to be smart about how you connect everything. This isn’t about overpowering your compressor; it’s about understanding its limits and using the right gear. We’ve found that with a few key components and some planning, you can easily have two or more tools running without a hitch.
The main goal is to ensure your compressor can provide enough air volume and pressure for all the tools you want to use simultaneously. Think of it like plumbing for your workshop. If you try to run too many faucets at once, the water pressure drops everywhere. It’s the same principle with compressed air.
Understanding Your Compressor’s Air Delivery: CFM is King
Before you even think about buying fittings, you need to know what your compressor can do. The most important number is its CFM rating. CFM stands for cubic feet per minute. This tells you how much air your compressor can deliver at a specific pressure, usually 90 PSI. This is the heart of your setup.
Why is CFM so critical? Because every air tool has its own CFM requirement. If you try to run a tool that needs 10 CFM with a compressor that only delivers 5 CFM, it simply won’t work correctly. The tool will likely be weak, run intermittently, or not run at all. We’ve seen many DIYers frustrated by this exact issue.
Finding Your Compressor’s CFM Rating
You can usually find the CFM rating on the specifications label attached to your air compressor. It might also be in the owner’s manual. Look for a number followed by “CFM” or “SCFM” (standard cubic feet per minute). SCFM is often a more accurate measure under standard conditions.
Make sure you’re looking at the CFM rating at the pressure you plan to use your tools. Most tools operate effectively around 90 PSI. Some compressors list a “peak” CFM, but you want the “duty cycle” or “continuous” CFM. This is the sustained air output.
Checking Your Air Tools’ CFM Requirements
Each air tool will have its own CFM requirement listed on its packaging, in the manual, or sometimes etched onto the tool itself. This is usually stated at 90 PSI. For example, a small brad nailer might only need 1-2 CFM, while a die grinder or impact wrench could require 5-10 CFM or even more.
To run multiple tools, you need to add up the CFM requirements of all the tools you intend to use at the same time. For instance, if you want to run a framing nailer (4 CFM) and a small impact wrench (5 CFM) together, you’ll need a compressor that can deliver at least 9 CFM. Many experts recommend having a buffer, so aiming for 1.5 times the total CFM needed is a good practice.
The Importance of Proper Air Hoses and Fittings
Once you know your compressor’s capabilities and your tools’ needs, the next step is connecting them. The size and length of your air hoses matter a lot. Using hoses that are too small or too long can restrict airflow and drop pressure. This is like trying to drink a thick milkshake through a tiny straw.
Choosing the Right Hose Size
Air hoses are typically measured by their inner diameter. For most common workshop tools and compressors, a 3/8-inch inner diameter hose is a good choice. If you’re running higher-demand tools or need to go longer distances, a 1/2-inch hose might be better. Smaller hoses, like 1/4-inch, are usually only suitable for very light-duty tools or short runs.
A smaller diameter hose creates more friction and resistance. This means your compressor has to work harder, and the pressure reaching your tool will be lower. We found that upgrading from a 1/4-inch to a 3/8-inch hose made a noticeable difference in tool performance.
Hose Length Considerations
The longer the hose, the more resistance your air encounters. While you need enough hose to reach your workspace, try to keep it as short as reasonably possible. For every 25 feet of hose, you can lose about 1 PSI of pressure (this can vary based on hose diameter and airflow).
If you need to run long distances, consider using a larger diameter hose or joining multiple shorter hoses together with appropriate fittings. Always ensure your fittings are rated for the pressure your system operates at.
Standard Fittings and Couplers
Most air tools and compressors use standard fittings. The most common in North America is the “industrial” or “T-style” coupler. These are robust and designed for higher airflow. You’ll also find “automotive” or “A-style” couplers, which are smaller and often found on lighter-duty hoses and tools.
Make sure all your fittings are compatible. Using mismatched couplers can lead to leaks and restrict airflow. A common setup involves a quick-connect coupler on your compressor’s regulator and then matching couplers on your hoses and tools. When connecting multiple tools, you’ll want a way to distribute the air.
The Power of a Manifold: Distributing Your Air Supply
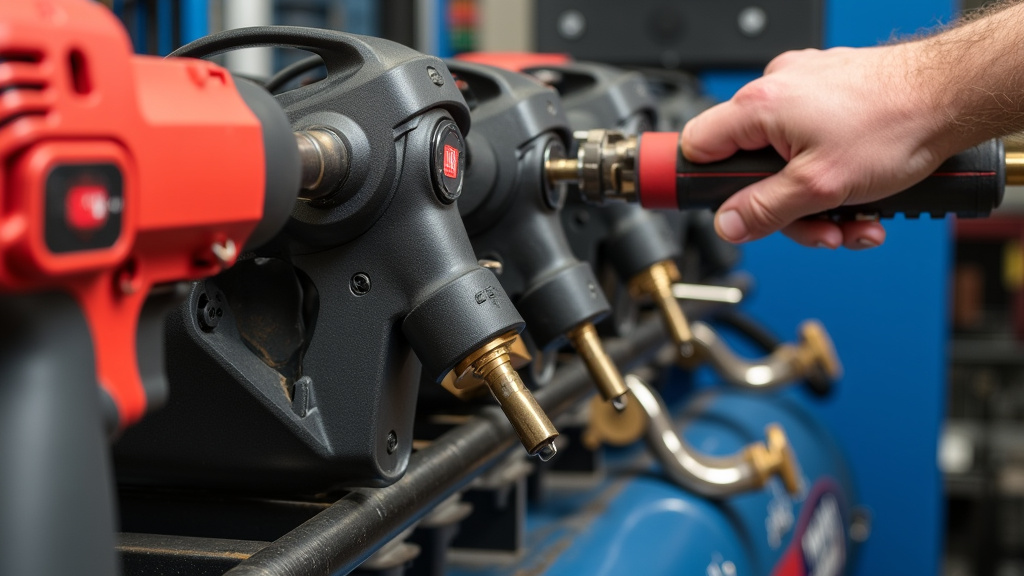
This is where you can really start running multiple tools. An air manifold, sometimes called a distribution block or splitter, is a device with multiple outlets designed to split a single air source into several. It’s the most practical way to connect two or more tools simultaneously.
How a Manifold Works
Think of a manifold as a central hub. Your main air hose from the compressor connects to one inlet on the manifold. The manifold then has several outlets, each with its own connection point (usually a quick-connect coupler). You can then attach separate air hoses to each outlet, running them to different tools or different workstations.
We found that using a manifold significantly streamlines the setup. Instead of running multiple hoses back to the compressor, you just run one main hose to the manifold. This keeps your workspace tidier and reduces the risk of tripping over hoses.
Choosing the Right Manifold
Manifolds come in various configurations, with different numbers of outlets (2, 3, 4, or more). When choosing one, consider:
- Number of Outlets: How many tools do you realistically plan to run at once?
- CFM Rating: Ensure the manifold itself can handle the total CFM your tools require. A cheap manifold might restrict flow.
- Inlet Size: Match the inlet size to your main supply hose.
- Outlet Size: Most common manifolds use 1/4-inch NPT (National Pipe Taper) threads for the outlets, to which you’ll attach your desired couplers.
Some manifolds even have individual shut-off valves for each outlet. This is a fantastic feature because it allows you to turn off air to one tool without affecting the others. It’s great for changing tools or if one tool isn’t in use.
Setting Up Your Multi-Tool System: A Step-by-Step Checklist
Ready to get connected? Here’s a simple checklist to guide you through the process. This will help you avoid common pitfalls and ensure your setup is safe and effective.
- Assess Compressor Capacity: Verify your compressor’s CFM rating.
- Calculate Tool Demand: Add up the CFM needs of the tools you’ll use together.
- Select Appropriate Hoses: Choose hoses with the correct inner diameter and a length that’s not excessive.
- Gather Fittings: Ensure you have compatible couplers and connectors for hoses and tools.
- Choose a Manifold: Select a manifold with enough outlets and a sufficient CFM rating.
- Connect Everything Securely: Assemble your system, ensuring all connections are tight and leak-free.
Taking these steps ensures you’re not asking your compressor to do the impossible. It’s about working smarter, not harder. Many people think bigger is always better, but matching your gear to your needs is key.
Troubleshooting Common Issues
Even with careful planning, you might run into a few snags. Here are some common problems and how to fix them.
Low Air Pressure or Flow
This is usually the result of one or a combination of issues:
- Undersized Compressor: Your compressor simply can’t keep up with the demand. You might need a larger compressor if this is a frequent problem.
- Hose Restrictions: The air hose is too small, too long, or kinked. Check for any bends that are too sharp.
- Leaky Connections: Air leaks are a major energy and pressure drain. Listen for hissing sounds and check all your fittings and hoses. Even a small leak can add up.
- Blocked Filter: The air intake filter on your compressor might be clogged.
- Manifold Limitations: The manifold itself might be a bottleneck if it’s not rated for the CFM you’re pushing through it.
We found that using an air leak detector spray can be very helpful in finding those tiny, hard-to-hear leaks. A quick spray on each connection point will show bubbles if there’s a leak.
Tools Not Performing Correctly
If your tools are weak, sputtering, or not cycling properly, it’s almost always a pressure or volume issue. Double-check the CFM requirements against your compressor’s output. Ensure your regulator is set correctly and that all connections are secure. Sometimes, a tool might simply be worn out or require more air than you realize.
Remember to always turn off the air supply and bleed the pressure from the system before disconnecting or changing tools. This is a basic safety measure that prevents unexpected tool movements.
Conclusion
Hooking up multiple air tools to one compressor is totally achievable with a little know-how. The key is matching your tools’ air demands to your compressor’s output, paying close attention to that CFM rating. Don’t forget that your air hoses and fittings play a huge role in maintaining pressure and flow. Using a manifold is your best bet for a clean and efficient multi-tool setup. By following these steps, you’ll avoid common frustrations like low pressure and ensure your tools perform as they should, boosting your workshop productivity. Now, go get those projects done!
Frequently Asked Questions
Can I run any air tool simultaneously if I have a manifold?
Not necessarily. While a manifold lets you connect multiple tools, your compressor still needs enough CFM to power them all at once. Always add up the CFM requirements of the tools you plan to use together and compare that to your compressor’s output.
What happens if my compressor’s CFM is lower than my tools’ combined CFM?
If your compressor can’t meet the air demand, you’ll likely experience reduced tool performance. Tools might run weakly, cycle improperly, or stop working altogether. Your compressor will also run constantly and could overheat.
Do I need a special type of hose for running multiple tools?
Yes, it’s recommended. Using a larger inner diameter hose, like 3/8-inch or 1/2-inch, helps maintain better airflow and pressure, especially when running multiple tools or over longer distances. Avoid undersized hoses.
How can I tell if I have air leaks in my system?
The most common sign is a hissing sound near fittings or hoses. You can also use a soapy water solution sprayed on connections – bubbles indicate a leak. Another option is a dedicated air leak detector spray, which we found very effective.
Is it safe to have multiple tools connected at the same time?
Yes, it’s safe as long as your compressor can handle the load and all connections are secure and leak-free. Always ensure your fittings are rated for your system’s pressure and follow safety guidelines like bleeding pressure before disconnecting tools.