How To Test Air Suspension Compressor Relay?

To test an air suspension compressor relay, you will primarily use a multimeter to check for continuity and proper voltage. A failing relay often prevents your air compressor from activating, causing your vehicle’s suspension to sag unevenly.
- A multimeter is your best friend for checking relay health.
- Start by locating the relay, often in a fuse box under the hood or dash.
- You’ll check for power at the relay socket and then test the relay itself for continuity.
- Symptoms like a constantly running or completely silent compressor often point to relay issues.
- Safety first! Always disconnect the battery before working with electrical components.
How To Test Air Suspension Compressor Relay?
Testing your air suspension compressor relay involves a few straightforward steps using a multimeter to diagnose its functionality. This helps determine if it’s sending power correctly to your compressor.
Understanding Your Air Suspension System
Your vehicle’s air suspension system relies on a compressor to maintain ride height. Think of it like a dedicated air pump. This compressor needs a signal to turn on and off, and that’s where the relay comes in.
The relay acts as a tiny, electrical switch. It gets a low-power signal from the control module, and in turn, it connects the compressor to a higher-power circuit. No working relay, no air compressor action, and your ride might start to feel less than luxurious.
Signs of a Faulty Relay
Before you even grab your tools, what makes you suspect the relay? Many experts say recognizing the symptoms is half the battle. You might notice your vehicle sagging on one side or perhaps all four corners.
Sometimes, the compressor might run constantly, draining your battery, or it might not run at all. These are strong hints that your relay might be on the fritz, or it could be the compressor itself, or even a fuse.
Common Symptoms to Watch For
- Your vehicle’s ride height is inconsistent or too low.
- The air compressor never turns on, even when needed.
- The air compressor runs non-stop, even after the vehicle reaches correct height.
- A “Service Air Suspension” message appears on your dashboard.
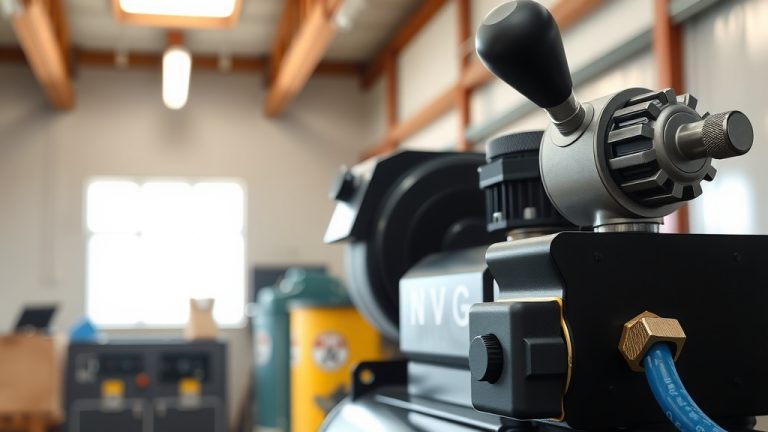
Tools You’ll Need for Testing
Gathering the right tools beforehand makes the testing process much smoother. You won’t need a whole workshop, just a few key items. Think of it like preparing for a quick at-home diagnostic appointment.
The most important tool will be your multimeter. We found that a digital multimeter is easiest to read. You’ll also want some basic hand tools for accessing the relay, like a trim panel remover or a small socket set.
Essential Tool List
Here’s a quick list to get you ready:
- Digital Multimeter
- Vehicle Owner’s Manual (for relay location and diagram)
- Small Flat-Head Screwdriver or Trim Removal Tool
- Gloves and Eye Protection (safety first!)
- Jumper Wires (optional, for bench testing)
Safety Precautions First
Working with vehicle electronics requires a cautious approach. It’s not just about protecting your car, but also your own well-being. Many automotive guidelines stress the importance of disconnecting power.
Always remember to disconnect your vehicle’s battery before messing with any electrical components. This prevents accidental shorts or shocks. Think of it as hitting the “off” switch before performing maintenance.
Locating the Air Suspension Compressor Relay
The first step is finding the relay itself. This can sometimes feel like a treasure hunt! We found that relays are typically located in either the under-hood fuse box or a fuse box within the passenger compartment.
Your vehicle’s owner’s manual is your best guide here. It will have a diagram showing the exact location and often label what each relay controls. Don’t be afraid to consult it; it’s there to help you.
Pre-Test Checklist
Before you dive into testing, a quick once-over ensures you’re ready. This little checklist helps you confirm everything is set for an accurate and safe test.
- Battery Disconnected: Is your vehicle’s battery safely disconnected?
- Relay Located: Have you found the correct air suspension compressor relay?
- Manual Handy: Do you have your owner’s manual for reference?
- Tools Ready: Is your multimeter and other tools within reach?
- Safety Gear On: Are your gloves and eye protection in place?
Step-by-Step Guide to Testing the Relay
Now, let’s get down to the actual testing. We’ll cover two main methods: checking the relay’s socket for power and then testing the relay unit itself. This methodical approach helps pinpoint the problem.
Testing the Relay Socket for Power
This step checks if power is even getting to where the relay sits. Think of it as checking if the light switch has electricity before blaming the bulb. A missing power signal here means the problem might be further upstream, like a fuse or wiring.
With your multimeter set to DC voltage, reconnect the battery briefly. Touch the red probe to one of the socket terminals and the black probe to a good ground. You should see a reading close to your battery voltage (around 12V). Repeat for other power terminals based on your vehicle’s wiring diagram.
Bench Testing the Relay for Continuity
This test focuses on the relay itself. You’ll be looking for signs that the internal switch is working. Many automotive guides suggest this method as a reliable way to verify relay function.
Most standard automotive relays have four or five pins. You’ll be looking for the coil pins (usually labeled 85 and 86) and the switch pins (30 and 87/87a). Disconnect the battery again before removing the relay.
Measuring Coil Resistance
With the relay out, set your multimeter to measure resistance (Ohms). Place your probes on pins 85 and 86. You should get a reading between 60 to 100 Ohms. If you get no reading (open circuit) or a very low reading (short circuit), the coil is likely bad.
Checking Switch Continuity
Now, you need to apply 12V power to the coil pins (85 and 86) using jumper wires, mimicking the control module’s signal. Listen for a faint click, which indicates the internal switch is activating. While power is applied, set your multimeter to continuity mode.
Place your probes on pins 30 and 87 (or 87a, depending on relay type). You should hear a beep or see a zero reading, indicating continuity. If no continuity, even with the click, the internal switch is faulty. Remove power from the coil immediately after testing.
Interpreting Your Results
What do your multimeter readings tell you? Let’s break it down. Understanding these results helps you decide your next steps, whether it’s replacing the relay or looking elsewhere.
| Test Result | Interpretation | Next Step |
|---|---|---|
| No power at relay socket | Wiring or fuse issue before the relay. | Check related fuses and wiring. |
| Coil resistance too high/low (open/short) | Relay coil is faulty. | Replace the relay. |
| No continuity when coil energized | Relay switch is faulty. | Replace the relay. |
| All tests pass, but compressor not working | Relay is good; problem is elsewhere. | Check compressor, wiring, or control module. |
What if the Relay is Good?
If your relay tests perfectly, don’t worry! This simply means the issue lies elsewhere in your air suspension system. The process of elimination is working. It helps narrow down potential culprits, saving you time and hassle.
You might need to check the air compressor motor itself, inspect the wiring harness for damage, or look into the suspension control module. Research often connects these components as a common chain of failure (automotive electrical guides).
Conclusion
Testing your air suspension compressor relay is a manageable task, even for the average DIY enthusiast, with the right tools and a little patience. By systematically checking for power at the socket and then evaluating the relay’s internal function, you can confidently diagnose if this small component is causing your suspension headaches. Remember, a working relay is key to a smooth and consistent ride, so tackling this diagnostic step early can save you from more extensive repairs down the road.
Is an air suspension compressor relay expensive to replace?
Generally, an air suspension compressor relay is a relatively inexpensive part, often costing between $20 to $50. The cost can vary based on your vehicle’s make and model, but it’s typically one of the more affordable components in the air suspension system.
Can a bad relay damage the air compressor?
Yes, a faulty relay can potentially damage the air compressor. If a relay sticks in the “on” position, the compressor might run continuously, leading to overheating and premature wear. Conversely, if it fails to engage, the compressor won’t operate at all, leading to suspension issues.
How long do air suspension compressor relays typically last?
The lifespan of an air suspension compressor relay can vary widely, but many are designed to last for several years or tens of thousands of miles. Factors like environmental conditions, vehicle vibration, and frequency of use can influence how long it lasts.
Can I bypass the air suspension compressor relay to test the compressor?
While technically possible to bypass the relay temporarily with jumper wires to see if the compressor motor engages, it’s generally not recommended for extended periods. This bypass sends direct power to the compressor, which might lack the normal safety controls, potentially causing damage or safety risks if not done correctly and cautiously.
What’s the difference between a fuse and a relay in this system?
A fuse protects the circuit from overcurrent, blowing out to prevent damage if too much electricity flows through. A relay, on the other hand, acts as a switch, using a small electrical current to control a larger current, allowing the vehicle’s computer to safely turn components like the air compressor on and off.