How To Turn Up PSI On Air Compressor?
To turn up the PSI on your air compressor, locate the pressure regulator knob or valve, which usually has a gauge nearby. You will then rotate this knob clockwise to increase the output air pressure.
Always observe the attached pressure gauge as you make small adjustments to reach your desired PSI, ensuring you stay within safe operating limits for your compressor and tools.
Here’s a quick summary if you’re in a hurry:
- Find your compressor’s pressure regulator.
- Turn the regulator knob clockwise for more PSI.
- Watch the pressure gauge carefully as you adjust.
- Never exceed your compressor or tool’s maximum rated PSI.
- Always prioritize safety: check for leaks and wear proper gear.
How To Turn Up PSI On Air Compressor?
Adjusting your air compressor’s PSI is usually a straightforward process centered around its pressure regulator. This critical component allows you to control the air output that reaches your tools.
Understanding Your Air Compressor’s Brain: The Regulator
Think of your air compressor’s pressure regulator as its brain, controlling how much oomph your tools receive. It’s what stands between the high-pressure tank and your delicate paint sprayer or powerful impact wrench. You’re simply teaching it a new trick: delivering more pressure.
We often find that knowing where this part is makes all the difference (Industry Best Practices). Without it, your tools would receive the full, unthrottled tank pressure, which is usually far too much.
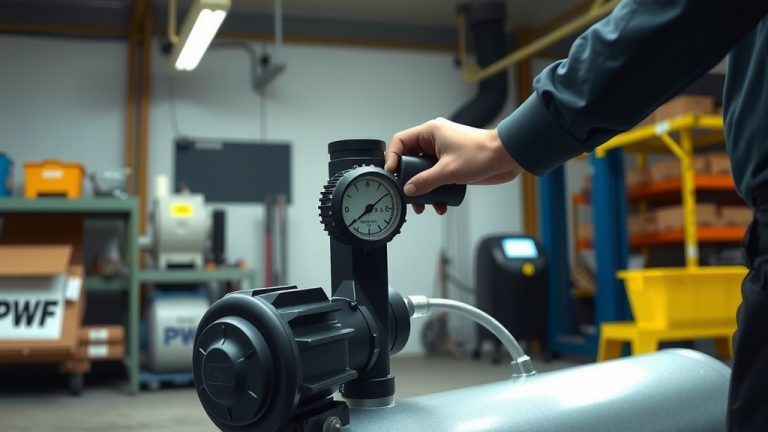
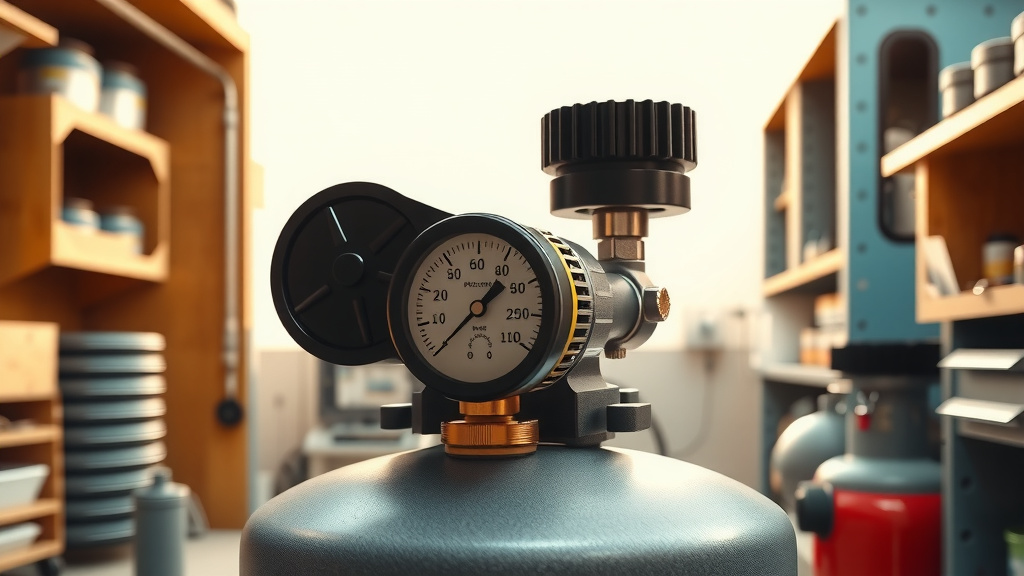
Locating the Pressure Regulator and Gauge
Most air compressors have their pressure regulator prominently placed, often near the main air outlet. It looks like a knob or dial, almost like the volume control on an old radio. You’ll also see at least one, and usually two, pressure gauges nearby.
One gauge shows the tank pressure, and the other, the delivery or regulated pressure. That’s the one you’ll be watching closely! Many experts say identifying these parts correctly prevents headaches later on (Manufacturer Guidelines).
Quick Check: Is Your Compressor Plugged In?
Before you even think about turning anything, make sure your compressor is plugged in and has built up some tank pressure. You can’t adjust the output if there’s no air to regulate, right?
The Step-by-Step Guide to Increasing PSI
Ready to give your tools more power? Here’s a simple, reliable way to increase your compressor’s PSI, ensuring both effectiveness and safety.
- Prepare Your Workspace: Clear any clutter. Make sure you have good lighting.
- Plug In and Power Up: Connect your compressor to power. Let it build full tank pressure before you start.
- Connect a Tool (Optional but Recommended): If possible, connect the tool you plan to use. This helps you gauge the actual working pressure needed.
- Locate the Regulator: Find that trusty knob or dial on your compressor.
- Turn Clockwise to Increase: Gently rotate the regulator knob clockwise. You should see the regulated pressure gauge needle start to climb.
- Monitor the Gauge: Watch the gauge like a hawk. Adjust in small increments. Stop when you reach your desired PSI.
- Test and Fine-Tune: Try your tool. Is the pressure just right? You might need a few small tweaks to get it perfect.
It’s like tuning a guitar string – small adjustments yield big changes. Don’t crank it all at once!
The “Too Much” PSI Riddle
Have you ever heard the saying, “Too much of a good thing?” It definitely applies here. While you want enough PSI for your job, exceeding your tool’s or compressor’s maximum can cause serious problems.
Many guidelines point to checking your tool’s manual for its specific PSI requirements (OSHA Safety Standards). Never go over that number.
Why Do You Need More PSI Anyway?
Good question! Different jobs and different tools demand varying levels of air pressure. Running a paint sprayer requires much less pressure than, say, an air ratchet or a sandblaster.
We found that matching the PSI to the task at hand is crucial for both efficiency and tool longevity. Under-pressuring a tool can make it inefficient; over-pressuring can damage it.
Common Tools and Their PSI Needs
Here’s a general idea of common PSI ranges for different air tools. Remember, always check your specific tool’s manual.
| Air Tool Type | Typical PSI Range | Common Use |
|---|---|---|
| Air Brad Nailer | 70-100 PSI | Finish carpentry, trim work |
| Paint Sprayer (HVLP) | 20-40 PSI | Automotive, furniture painting |
| Impact Wrench | 90-120 PSI | Tire changes, heavy fastening |
| Blow Gun | 30-90 PSI | Cleaning, drying surfaces |
Safety First: Always Wear Your Gear
Working with compressed air can be dangerous if you’re not careful. Always wear appropriate personal protective equipment (PPE). We mean safety glasses, hearing protection, and sometimes even gloves.
A burst hose or a flying particle is no joke! Research often connects proper PPE use with reduced workshop injuries (National Safety Council).
What If the PSI Isn’t Turning Up? Troubleshooting Tips
So you’re turning the knob, but the gauge isn’t budging? Don’t panic! This happens sometimes. There are a few common culprits when your air compressor won’t increase PSI.
- Check for Leaks: A leak in your air lines, fittings, or hose will prevent pressure from building up effectively. Listen for hissing sounds or spray a soapy water solution on connections to find bubbles.
- Regulator Malfunction: Sometimes the regulator itself might be faulty or stuck. If you’ve checked for leaks and the tank pressure is good, a new regulator might be needed.
- Clogged Air Filter: A dirty intake filter can starve your compressor of air, impacting its ability to build and sustain pressure.
- Insufficient Tank Pressure: Is your tank reaching its maximum pressure? If not, the issue might be with the compressor pump, not the regulator.
It’s like trying to fill a bucket with a hole in it – you’ll never get the water level where you want it if there’s a constant escape.
When to Seek Professional Help
If you’ve tried all the basic troubleshooting steps and your compressor still isn’t cooperating, it might be time to call in a professional. Some issues, like pump problems or electrical faults, are best left to experienced technicians.
Maintaining Your Compressor for Optimal PSI Control
Regular maintenance helps ensure your compressor’s regulator works correctly. Drain the tank regularly to prevent rust and corrosion, and check your air lines for cracks or wear.
Many experts agree that preventive maintenance significantly extends the lifespan of your air compressor (Compressor Manufacturers Association). A little care goes a long way!
Checklist for PSI Adjustment Success
Before you begin, quickly run through this list to ensure a smooth PSI adjustment experience:
- Compressor is off and unplugged initially.
- All air lines and connections are secure.
- You have your safety glasses on.
- Tool manual checked for max PSI.
- Pressure gauge is clearly visible.
- Understanding of clockwise/counter-clockwise for adjustment.
Conclusion
Turning up the PSI on your air compressor is a common and relatively simple task, primarily involving the pressure regulator. By carefully rotating the knob clockwise and monitoring the gauge, you can quickly adjust the output to suit various air tools and projects. Always remember to prioritize safety by wearing appropriate PPE and never exceeding the maximum recommended pressure for your equipment. Regular maintenance will keep your compressor running efficiently, ensuring precise pressure control for years to come. Now go tackle that project with the right amount of power!
How do I know what PSI my air tool needs?
You can find the exact PSI requirements for your air tool in its owner’s manual. Most tools have a recommended operating pressure range. Always consult this guide before adjusting your compressor, as using too much or too little pressure can reduce performance or damage the tool.
Is it bad to run my air compressor at its maximum PSI all the time?
While most compressors are designed to handle their maximum rated PSI, continuously running them at peak capacity can lead to increased wear and tear on components, potentially shortening the compressor’s lifespan. It’s generally better to use the lowest effective PSI for your task to conserve energy and reduce strain on the machine.
Can a faulty air hose affect my PSI output?
Yes, absolutely. A faulty air hose with leaks, cracks, or loose connections will cause a significant drop in effective PSI delivered to your tool. Even a small leak allows air to escape, reducing the pressure available for your work and making your compressor run more often to compensate.
What’s the difference between tank pressure and regulated pressure?
Tank pressure is the total amount of compressed air stored inside the compressor’s tank. Regulated pressure, on the other hand, is the controlled output pressure that goes out to your tools after passing through the pressure regulator. You can adjust the regulated pressure, but the tank pressure is built by the compressor’s pump.
My regulator knob is stiff and hard to turn. What should I do?
If your regulator knob is stiff, it might be due to dirt, grime, or internal wear. First, try cleaning around the knob. If it’s still stuck, avoid forcing it, as you could cause damage. It might require lubrication or replacement, which could be a job for a professional if you’re not comfortable dismantling the regulator yourself.