How to Choose an Upholstery Staple Gun for Plastic
For plastic upholstery bases, choose a tool that controls staple length and driving depth without cracking the base. Short staples, a tested trigger and a nosepiece that sits flat matter more than raw power.
On this page (15 sections)
- What makes plastic different from wood for stapling?
- How do you assess staple length for plastic upholstery bases?
- Why does tool power matter more on plastic?
- How does nosepiece shape affect plastic bases?
- What trigger type helps you work safely on plastic?
- When does a nailer make more sense than a stapler?
- What depth settings protect thin plastic?
- How do you space staples on a plastic base?
- What safety steps matter when stapling plastic?
- How do you set up a pneumatic tool without overdriving plastic?
- Which product style suits which plastic upholstery job?
- How do you test a staple gun on scrap plastic before real work?
- How do you fix problems when staples crack or pull out?
- What care keeps a staple gun working on plastic jobs?
- How do you choose the final tool for your plastic upholstery project?
For plastic upholstery bases, choose an upholstery staple gun for plastic that controls staple length and driving depth without cracking the base. Short staples, a stable nosepiece and a trigger you can control matter more than extra power.
Plastic behaves differently from wood. It can flex, whiten under stress, or split along a molded line.
A staple that is perfect in timber can crack a thin plastic shell in one shot.
That is why planning beats force here. Measure the plastic, test on scrap, and pick a tool and staple length for the job in front of you.
What makes plastic different from wood for stapling?
Plastic does not grip a staple leg the way wood does. Wood fibers close around the metal, while plastic can deform or crack if the leg lands too close to an edge.
Molded plastic also has ribs, curves and thin sections. A staple crown that sits flat on a rib may bridge across a recess and rock under the next shot.
Temperature matters too. Cold plastic can be more brittle, and heat from a sunny room can make it softer.
Test in the room where you will work.
Fabric tension changes the risk as well. Pulling fabric hard can make a staple split the plastic as the fabric springs back.
Light, even tension is safer.
Rule: treat plastic as a brittle base, not as wood, and design every choice around edge distance and depth.
How do you assess staple length for plastic upholstery bases?
Staple length is the first setting to check for plastic work. You need enough length to pass through fabric and any foam layer and bite into the base, without excess length that can split or poke through.
Measure the full stack at the spot where you plan to staple. Fabric, foam, padding and plastic thickness all count, and the stack can change when you pull it taut.
Start with the shortest staple that holds. Test two or three lengths on scrap plastic that matches the real base.
Check the back for sharp points and the front for cracks.
Watch the crown as well. A wide crown spreads load, but it can also press hard on a thin plastic lip.
A crown that rocks is a warning sign.
Rule: pick the shortest staple length that holds firmly on scrap plastic, and move up only if it pulls out.
Why does tool power matter more on plastic?
Power controls how fast the staple drives and how hard it hits. On plastic, a hard hit can crack the base before you have time to react.
Pneumatic tools can be strong and fast. That speed helps on large runs, but it also means a missed staple can damage plastic in a fraction of a second.
Electric and manual tools often give a slower rhythm. That rhythm helps you keep the nosepiece flat and stop after each staple.
Cordless tools remove the hose, but they still drive with force. The battery system does not make a tool gentle by itself.
Rule: choose the least powerful tool that drives the staple flush on scrap plastic, then stay with it.
How does nosepiece shape affect plastic bases?
The nosepiece is the part that touches the plastic. A flat, stable nosepiece spreads contact and helps the staple enter straight.
A narrow or pointed nosepiece can dig into soft plastic or slip on a curved molded surface. That slip can bend a staple or start a crack.
Keep the nosepiece clean and check for burrs. A small burr can score plastic and make the next staple land off line.
On ribs and edges, position the staple so the crown rests on a flat area. If no flat area exists, move the staple line or add a support block behind the plastic.
Rule: use a nosepiece that sits flat on the plastic, and never staple across a gap, rib or sharp curve.
What trigger type helps you work safely on plastic?
Trigger control is your main safety tool on plastic. A sequential trigger that fires one staple per pull helps you place each staple on purpose.
Contact or bump firing can send a second staple before you move your hand. That speed is useful on open timber work, but it is risky on thin plastic.
Dual triggers and safety interlocks can add a pause. They do not replace a steady hand, but they can prevent a stray shot when you reposition.
Practice the start and stop on scrap before you start on the real piece. If you cannot stop cleanly, the tool is too fast for this job.
Rule: use a sequential, one-shot trigger for plastic upholstery, and avoid bump firing on molded bases.
When does a nailer make more sense than a stapler?
A nailer makes sense when the plastic part needs a pin or brad in a specific spot. Some plastic trims, panels and molded corners hold better with a single fastener than with a wide staple crown.
Nails also help when a staple crown would bridge a recess or press on a raised ridge. One small fastener can sit in a flat pocket where a staple cannot.
The trade-off is holding pattern. A staple spreads load across fabric.
A nail puts most of the hold in one point.
That is why many upholstery jobs mix tools. Staples hold fabric to the base, and pins hold trim or small plastic parts in place.
Rule: use a nailer for pointed placement on plastic trim, and use staples for wide fabric hold.
DEWALT cordless brad option for trim and small plastic parts
The DEWALT DCN680B is a 20V MAX* XR® 18 GA Cordless Brad Nailer (Tool Only). DEWALT says it drives 18 GA brad nails from 5/8 in to 2-1/8 in, which covers many trim and casing tasks.
Its brushless motor, micro nose, tool-free depth adjustment and low nail lockout help with precise placement. Tool-free jam release and a stall release lever help you clear problems without opening the tool.
It runs on a DEWALT 20V MAX* lithium-ion battery and removes the need for gas, a compressor and a hose. Multi-functional LED lights help with workspace light and tool diagnostics.
For plastic upholstery, think of this as a spot tool, not a fabric stapler. It can pin trim and small parts where a staple crown would be too wide.
Rule: choose this style of tool for precise pinning on plastic trim, not for wide fabric fastening.
What depth settings protect thin plastic?
Depth control is the line between a flush staple and a cracked base. Too shallow leaves a crown that snags fabric.
Too deep crushes plastic and can split it.
Set depth on scrap plastic first. Fire one staple, check the crown, and adjust in small steps.
The crown should sit flush with no deep ring around it.
Tool-free depth adjustment helps, but it does not remove the need to test. Change the plastic thickness and you may need a new setting.
Listen for a change in sound. A sharp crack or a dull pop can mean the plastic is splitting instead of holding.
Rule: set depth on scrap plastic until the crown sits flush, then lock that setting for the real base.
How do you space staples on a plastic base?
Spacing controls how the fabric load reaches the plastic. Staples too close to an edge can split it.
Staples too far apart can let fabric sag and pull.
Mark the staple line before you start. Keep a consistent distance from edges and from molded ribs.
Measure from the same reference point each time.
On curves, shorten the spacing rather than forcing one long straight run. A curve pulls fabric in two directions, and the plastic has less flat support there.
Test a short run on scrap, then flex the piece as you would in use. If a staple line opens or the plastic whitens, change the line.
Rule: keep staples on flat plastic, away from edges, and shorten spacing on curves.
What safety steps matter when stapling plastic?
Safety starts with eye protection and a clear work area. Plastic chips and bent staples can fly when a staple hits a rib or a hard edge.
Check the tool before each session. Confirm the staple length, depth setting and trigger action.
Remove a bent staple or jam before you load new fasteners.
Keep your free hand behind the staple line. Plastic can flex under pressure, and a hand that supports the back can also be in the path of a stray staple.
Our nail gun guide covers general nailer safety in more detail, and it helps to read it before you use any fastening tool on a new base.
Rule: wear eye protection, keep hands behind the staple line, and test the tool on scrap before each new plastic base.
How do you set up a pneumatic tool without overdriving plastic?
Pneumatic setup needs low pressure first, then careful increases. Start low, test on scrap, and raise pressure only until the staple drives flush.
Start with our Best Air Compressor For Staple Gun guide to match compressor output to the tool. Too much pressure can crack plastic even with the right staple length.
Then follow How To Use Air Compressor Staple Gun? for hose, trigger and depth checks. Connect the hose, check for leaks, and confirm the trigger fires one staple at a time.
Drain moisture from the line as directed for your compressor. Water can affect tool action and can leave marks on fabric.
Rule: start pneumatic pressure low, test on scrap plastic, and raise it only until staples sit flush.
Which product style suits which plastic upholstery job?
Match the tool to the size of the job and the type of plastic part. Small repairs need control.
Large panels need speed, but they still need careful depth.
For beginners, our best upholstery staple gun for beginners list helps you compare trigger and depth features. Start there if this is your first upholstery project.
If you prefer hand power, our best manual staple gun for upholstery guide shows slower tools that can suit small plastic bases. Manual tools reward patience and give you time to stop.
For powered work, our best electric staple gun for upholstery guide covers corded and cordless options. Electric tools can be a middle path between manual and pneumatic speed.
Our broader best upholstery staple gun roundup helps you compare more styles before you narrow the choice.
Rule: pick the slowest tool that still finishes the job, then tune staple length and depth on scrap plastic.
Heavy pneumatic option for large panels, with care
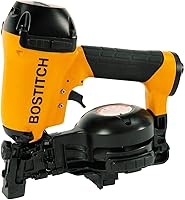
The BOSTITCH Coil Roofing Nailer, model RN46, handles 3/4 in to 1-3/4 in fasteners and weighs 5.8 lb. BOSTITCH describes a lightweight aluminum housing, zero nail lockout, carbide nosepiece inserts and wear guards.
It has a quick-set adjustable depth guide, a patented single-action side load canister and an adjustable shingle guide. BOSTITCH says it delivers 410 in./lbs. of force at 100 psi and can drive up to 100 nails per minute, with contact trip and sequential trip modes.
This is a roofing and exterior panel tool. It is not a fabric staple gun, and its size and force make it a poor fit for small plastic upholstery bases.
We include it here as a warning example. Do not use a coil roofing nailer on thin upholstery plastic.
The fastener type, head size and driving force do not match the task.
Rule: skip heavy roofing nailers for upholstery plastic, and choose a tool made for staples or small pins.
Light pneumatic pin option for delicate plastic trim
The Metabo HPT NP35A is a 23 Gauge Pin Nailer that weighs 2.0 lb. Metabo HPT says it fires 23-gauge headless pins in 5/8 in, 3/4 in, 1 in, 1-3/16 in and 1-3/8 in lengths, with automatic adjustment.
It has depth adjustment for flush drives, a dual trigger, a rear exhaust and a no-mar tip. Metabo HPT lists cabinets, paneling, small moldings and trim, glazing bead, craft work and picture frame assembly as uses.
Headless pins leave small holes, which can help on delicate trim. They also give less holding power than staples, so they suit light trim rather than loaded fabric.
The NP35A comes with a carrying case, two no-mar tips, safety glasses, a 1/4 in NPT male plug and a hex bar wrench. Metabo HPT backs it with a professional 5-year tool warranty.
Rule: use a light pin nailer for delicate plastic trim, and use staples where fabric needs wide hold.
How do you test a staple gun on scrap plastic before real work?
Testing is the step that prevents most plastic damage. Use scrap plastic that matches the real base in thickness and shape.
Mark a test grid with the staple line you plan to use. Fire one staple at each depth setting and note the result.
Check the front for cracks, whitening or a crushed ring. Check the back for points, bent legs or splits.
Flex the scrap as you would in use.
Change one variable at a time. Change staple length, then depth, then spacing.
That order shows you which setting caused the problem.
Keep the test piece. It becomes your reference for the next panel, especially if the plastic comes from the same molded part.
Rule: never test on the finished piece first, and keep a marked scrap sample for every new plastic base.
How do you fix problems when staples crack or pull out?
Cracks usually mean the staple is too close to an edge or the depth is too high. Pulling out usually means the staple is too short or the plastic is too thin at that spot.
For cracks, move the staple line toward flatter, thicker plastic. Lower the depth and try a shorter staple if the hold allows it.
For pull-out, check that the staple leg has enough length to bite. If a longer staple splits the plastic, add a support block behind the base or move to a rib.
Bent staples often come from a nosepiece that rocks. Clean the nosepiece, press it flat, and slow your trigger pull.
Rule: fix cracks by moving the line and lowering depth, and fix pull-out by checking length and support.
What care keeps a staple gun working on plastic jobs?
Care keeps depth, trigger and nosepiece consistent. A tool that misfires on plastic can do damage fast.
Wipe the nosepiece after each session and check for burrs. Remove bent staples and clear jams with the tool powered off and disconnected.
Store staples dry. Rusty staples can score plastic and can bend instead of driving straight.
For pneumatic tools, follow the maker instructions for oiling and air care. For electric and cordless tools, check cords, batteries and battery contacts before you start.
Rule: clean the nosepiece, check depth and trigger action, and store fasteners dry before every plastic upholstery session.
How do you choose the final tool for your plastic upholstery project?
The final choice comes down to staple length range, depth control and trigger control. Power comes last, because plastic punishes excess force.
List your plastic thickness, fabric stack and staple line. Then pick a tool that can drive the shortest staple that holds, sit flush on scrap, and fire one staple per trigger pull.
If you need wide fabric hold, stay with a staple tool. If you need pointed placement on trim, consider a brad or pin nailer for that part of the job.
For your upholstery staple gun for plastic, test on scrap, keep staples away from edges, and stop the moment you see whitening or splitting. That careful routine protects both the plastic base and the finished piece.
Frequently asked questions
What staple length works best for plastic upholstery bases?
Use the shortest staple length that holds fabric and foam securely to the plastic base, then test on scrap plastic first. Longer staples can split thin plastic or poke through the back, while too short a staple can pull out under tension.
Can a regular nail gun replace a staple gun for plastic?
A nail gun can work for some plastic parts, but it is not a direct staple replacement. Nails hold in a different pattern and can crack plastic if the point is too close to an edge, so test depth and spacing on a spare piece first.
How do you avoid cracking plastic when stapling upholstery?
Keep staples away from edges, use light pressure, and set depth so the crown sits flush without crushing the plastic. Test on scrap plastic from the same base theme, and stop if you see whitening, splitting or raised cracks around the staple.
Manual, electric or pneumatic: which is safer for plastic?
Manual and electric tools often give you slower, easier control for plastic, while pneumatic tools need careful pressure setting. Pick the tool you can start and stop cleanly, and practice on scrap material before you work on the real upholstery base.
What should you check before buying a staple gun for plastic?
Check staple length range, depth control, trigger type, nosepiece shape and the fastener type the tool uses. Then match those points to your plastic thickness and fabric load, and confirm the tool can be stopped quickly if a staple misses or bends.