What Size Nails Should You Use for Joist Hangers?
Most joist hangers use 8d or 10d connector nails, and many heavy hangers use 16d nails in the larger holes. Match the nail diameter and length to the holes in the hanger, the thickness of the joined lumber and the hanger maker's instructions.
On this page (11 sections)
- Why do joist hanger holes control the nail size?
- What is the 8d, 10d and 16d system for connector nails?
- Which size fits standard 2x joists and hangers?
- When do heavy hangers need 16d connector nails?
- How do you fill every hole in a joist hanger?
- Which coating should you choose for outdoor or treated wood?
- Nails, screws or bolts for the hangers you own?
- Which nail gun or palm nailer fits connector nails?
- What mistakes waste nails or split the joist?
- How should you check your work after the hangers are set?
- What size nails for joist hangers should you buy for your next job?
Most joist hangers use 8d or 10d connector nails, and some heavy hangers use 16d nails in the larger holes. The hanger instructions control the choice, not the nail you already own.
A joist hanger is a metal bracket that holds a joist or rafter to a beam, ledger or another joist. Every hole in the bracket is meant to be filled with a fastener that matches its diameter.
If a fastener is too thin, it can move in the hole and the joint can loosen over time. If it is too thick, it can split the joist or bend while driving.
The safest order is simple. Read the hanger box, check the hole size, then buy the listed connector nail size.
Our nail gun guide helps if you plan to drive these fasteners with a tool rather than a hammer. Tool choice matters because connector nails are short and thick, and they need full seating in tight holes.
For cordless options, see our DeWalt 20V nail guns.
Why do joist hanger holes control the nail size?
The holes decide the nail diameter first. A connector nail should fill the hole snugly without forcing the metal.
Connector nails look different from common framing nails you may already have in a bucket. They are usually shorter and thicker for their length, with a head sized to bear against the hanger.
A regular 16d framing nail can be too long and too thin for many hanger holes. It may pass through the joist and stick out the back, or it may wobble in the hole.
Short connector nails also reduce the chance of splitting wood near the end of a joist. Joists are often 2 inches thick, so a very long nail has little room to stay inside the lumber.
You can test the fit before you drive anything. Hold the nail in the hole and see if it slides freely or binds.
The right nail should enter the hole with light pressure and stop on its head. Do not drill out a hanger hole to make a larger nail fit, because that change can weaken the bracket and break the load rating.
The firm rule is to buy nails that match the holes as made.
What is the 8d, 10d and 16d system for connector nails?
The penny system is a shorthand for nail length and diameter. For joist hangers, 8d and 10d are common, and 16d appears on heavier hangers.
An 8d nail is about 2 and a half inches long in common framing terms. Connector 8d nails are often rated for light hangers and for the beam side of some brackets.
A 10d nail is about 3 inches long in common framing terms. Many standard joist hangers list 10d connector nails for the joist side, where the load is highest.
A 16d nail is about 3 and a half inches long in common framing terms. Heavy hangers may list 16d nails, but only where the hole and the lumber can take that size.
The penny label alone is not enough, because makers can sell connector nails with different diameters under similar labels. Always compare the listed diameter, length and head style on the box.
Look for words such as connector, hanger or metal connector on the package. Those words tell you the nail was made for bracket holes, not for general framing.
How to read a connector nail box
Check the nail length and the diameter in inches, not just the penny size. Check the head diameter, because the head must bear on the hanger and not pull through.
Check the coating and the code approval for outdoor or treated wood use. Keep the box or a photo of the label after the job starts.
The firm rule is to match all three measures at once, which are diameter, length and head size.
Which size fits standard 2x joists and hangers?
Standard hangers for 2x joists usually list 8d or 10d connector nails. For many 2x8, 2x10 and 2x12 joists, 10d nails are the starting point for the joist side.
That pattern shows up because the joist side carries the main hanging load. The beam or header side may use shorter 8d nails where the maker asks for them.
A 2x6 joist in a light hanger may list 8d nails instead. Smaller lumber and smaller brackets often pair with a shorter connector nail.
Do not assume that a bigger joist always needs a bigger nail. The hanger model, not the joist size alone, sets the fastener pattern and the hole size.
Some hangers use two different nail sizes on the same bracket. That is common, and it is not a mistake.
The joist side and the beam side have different loads and different lumber thicknesses. If the box lists two sizes, use both sizes exactly where the diagram shows them.
Do not swap them to use up leftover nails from another job. The firm rule is to follow the size shown for each side of that hanger.
When do heavy hangers need 16d connector nails?
Heavy hangers may list 16d connector nails for the joist side. Use 16d nails only when the hanger holes and lumber thickness call for them.
A 16d nail needs enough wood depth to hold without poking through the far side. On a 2 inch joist, a long nail can protrude or split the end grain if it is driven at a slight angle.
That risk is one reason many makers keep standard hangers at 8d or 10d. The hole pattern, the nail diameter and the wood depth are designed as a set.
If your hanger box lists 16d nails, check that the nails in your hand are connector nails, not long framing nails. The head and diameter must match the hole.
If the box lists 10d nails, do not move up to 16d because you want extra strength. A larger nail in a smaller hole can bend the hanger, split the joist and void the rating.
Heavy framing tools can drive thick connector nails, but the tool must accept the exact fastener. Our best joist hanger nailer guide explains why short connector fasteners need a tool that can place them in tight bracket holes.
The firm rule is to use 16d nails only where the hanger lists them.
How do you fill every hole in a joist hanger?
Fill every hole the maker requires, in the pattern shown. An empty hole is a missing fastener, and it lowers the strength of the connection.
Start by setting the hanger level and plumb before you drive the first nail. A crooked hanger can force nails to enter at an angle and split the wood.
Drive the beam side first if the instructions show that order, then set the joist in place. Seat the joist fully against the back of the hanger before you fasten the joist side.
Keep the nail straight and drive it until the head sits flat on the metal. A head that stops short can leave the hanger loose, and a head driven too hard can dimple the metal.
Check each hole as you go, because a missed hole is easy to hide behind the next joist. Mark filled holes with a pencil if that helps you keep count.
Do not use one long nail through two holes as a shortcut. Each hole needs its own fastener of the listed size.
The firm rule is to finish every required hole with a straight, fully seated connector nail.
Which coating should you choose for outdoor or treated wood?
Use a coating that matches the lumber and the exposure. For outdoor hangers and pressure treated wood, use hot dipped galvanized or stainless steel connector nails.
Plain bright steel nails can rust fast in outdoor use. Rust weakens the nail and can stain wood, and it can also damage the hanger coating over time.
Pressure treated wood needs a compatible coating, because some treatments speed up corrosion. The hanger box and the nail box should both point to treated wood use.
Electro galvanized nails are thinner coated and are meant for dry indoor use in many cases. They are not the first choice for a deck beam, a ledger or an exterior bracket.
Stainless steel costs more, but it resists rust in wet or coastal conditions. It can also be harder to drive, so test one nail in a scrap piece first.
Indoor floor framing can usually use standard connector nails with a suitable coating for dry service. The firm rule is to match the nail coating to the lumber treatment and to where the hanger will live.
Nails, screws or bolts for the hangers you own?
Use the fastener type listed for your hanger. Nails remain common for joist hangers because they are fast, and listed screws remain an option when the maker allows them.
Nails have good shear strength and drive quickly in a repetitive pattern. That speed matters when you set many hangers across a deck or a floor.
Screws can be easier to remove and can give strong holding power in the listed pattern. They need the exact type and length for the bracket, because a general wood screw is not a listed connector screw.
Our joist hanger screws vs nails guide compares the two options in more detail. Read it before you switch fasteners on a loaded joint.
Bolts often pass through a beam and a post or through thick lumber where a through fastener is needed. They are not a plain swap for short nails in bracket holes.
Do not mix a screw in one hole and a nail in the next to use up stock. Use one listed fastener system for the whole hanger, as the maker directs.
Which nail gun or palm nailer fits connector nails?
A tool must accept the exact connector nail size you chose. For tight hanger holes, a palm nailer or a tool made for connector nails often beats a large framing nailer.
Large framing nailers are built for long framing nails and bulky magazines. They can be hard to place in small bracket holes and can drive a nail at a poor angle.
A palm nailer puts the fastener right where you point it. That control helps in the tight space between a joist and a beam, where a full size nail gun may not fit.
Our palm nailer for roofing nails guide covers how palm nailers handle short fasteners and tight placement.
Pneumatic tools need a compressor that can keep up with the tool. Our How to Size an Air Compressor for a Nail Gun? guide helps you match air supply to the tool and the job.
Our Best Air Compressor For Nail Gun guide can help you plan the air side of the setup. Correct pressure helps seat connector nails fully without overdriving them.
How to choose a tool for short connector nails
Choose a tool that loads the exact nail length and diameter you need. Check the magazine size, the nose shape and the depth control before you buy.
A tool that is made for brad nails or pin nails will not drive thick connector nails. Those tools serve trim and finish work, not structural brackets.
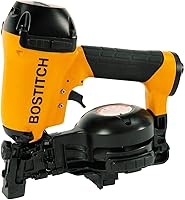
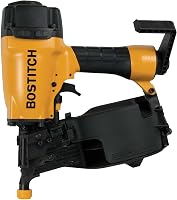
A coil roofing nailer also has a different job, because it loads coil nails for roofing and exterior work. It is not a substitute for a connector nail tool just because both are pneumatic.
Battery tools can work well when they accept the right fastener. Weight, nose access and depth control matter more than brand for this kind of short nail work.
Pin nailers are even lighter and are made for headless pins. They protect delicate trim, but that thin fastener cannot carry a joist load.
The firm rule is to pick a tool that loads your listed connector nail and fits the hanger holes.
What mistakes waste nails or split the joist?
The most common mistake is buying a generic framing nail instead of a connector nail. A nail that does not match the hole can split wood, wobble in the bracket or miss the load rating.
A second mistake is using a nail that is too long for the lumber. On a 2 inch joist, a long nail can exit the far side and create a hazard where people pass.
A third mistake is leaving holes empty to save time. That shortcut changes a tested pattern into a guess and can fail inspection.
A fourth mistake is driving nails at an angle to reach a hole. An angled nail can split the joist end and leave the head proud of the metal.
A fifth mistake is pairing the wrong coating with treated wood or outdoor exposure. Rust can weaken the connection long after the framing looks done.
Order matters too. If you fasten the joist side before the hanger is level, the bracket can end up crooked.
Test the listed nail in scrap wood before you fasten the real joists. That test shows if it splits the wood, seats well and has the right length.
How should you check your work after the hangers are set?
Check the work while the joists are still open and easy to reach. Confirm that every required hole is filled, every head is seated and no nail tip pokes through the wood.
Walk the row and count holes against the pattern on the box. A pencil mark in each filled hole makes a missed hole stand out fast.
Look for split ends at the joist tips, because a split can grow under load. If you find a split, you may need to cut back the joist or replace that piece.
Look for rust-prone nails in outdoor work, and check that the coating matches the lumber. This is the time to fix a coating mistake, not after the deck boards are on.
Check the hanger plumb and the joist bearing after all fasteners are in. A hanger that shifted during nailing can leave a gap at the back of the bracket.
Take photos of the completed connections before you cover them with sheathing or decking. Photos help with inspections, permits and future repairs.
Our pneumatic palm nailer reviews can help if you want more control for the next set of brackets. The firm rule is to inspect every hanger before you cover the framing.
What size nails for joist hangers should you buy for your next job?
Buy the size listed on your hanger box. For most standard hangers, start with 10d connector nails for the joist side and 8d connector nails where the box lists them.
That pair covers much deck and floor framing with 2x joists. Heavy hangers may add 16d connector nails, but only in the holes and lumber the maker lists.
Use joist hanger nails size as a shopping check, not as a guess. Match diameter, length, head size and coating to the hanger and lumber treatment.
Do not save money by using leftover framing nails. A low cost nail that does not fit the hole can cost you a joist, a hanger or an inspection.
Plan your order in sequence. First, read the hanger label.
Second, count the holes and sizes per hanger. Third, buy enough connector nails for every hole plus a spare box for bent nails.
Keep the nail box label with your project notes. It proves the size, coating and rating if someone asks later.
Frequently asked questions
What are joist hanger nails?
Joist hanger nails are short, thick connector nails made to fill the round holes in a metal hanger exactly. Their heads keep them from pulling through, and their length and diameter are chosen for the hanger and lumber being joined.
What size nails for joist hangers should I buy first?
Buy the size printed on the hanger box or in the hanger instructions first. Many light hangers list 8d or 10d connector nails, while heavier hangers may list 16d nails for the joist side and shorter nails for the beam side.
Can I use regular framing nails in a joist hanger?
Regular framing nails usually do not match the hanger hole size and may leave gaps or split lumber. Use the connector nail size and type listed for that hanger, and fill every hole the instructions require.
Are screws better than nails for joist hangers?
Screws and nails can both work when each one is rated and listed for that hanger. Nails are often faster and cheaper, while screws are easier to remove and can have strong holding power in the right pattern.