How To Check Air Compressor?
To check your air compressor, always start with a visual inspection for damage, leaks, or loose parts. Then, listen for unusual noises and verify the pressure gauge readings against specifications.
Regular checks on your air compressor are vital for safety and to keep it running smoothly, preventing breakdowns and ensuring efficient operation.
TL;DR: Here’s what you need to know about checking your air compressor:
- Always begin with a quick visual check for obvious issues like leaks or damage.
- Listen for any strange sounds, which can signal internal problems.
- Confirm the pressure readings are accurate and within safe limits.
- Regular maintenance, like checking oil and filters, prevents bigger headaches.
- Safety first: always power down and relieve pressure before any deeper inspection.
Ever wonder if your air compressor is really doing its best? Or maybe you just need to know if it’s safe to use? We understand that feeling. Checking your air compressor regularly isn’t just about making sure it works; it’s about keeping you safe and your projects on track.
Think of it like checking your car’s oil. You wouldn’t skip that, would you? The same goes for your compressor. A few simple checks can save you from a major headache later. We’re here to guide you through a straightforward process, making sure your equipment is in top working order.
How To Check Air Compressor?
To check your air compressor, begin by looking for visible damage or leaks. Next, listen for abnormal noises and confirm pressure gauge accuracy for safe, efficient operation.
Start With a Quick Visual Inspection
Before you even power it on, take a good look at your compressor. Are there any visible cracks, dents, or signs of wear? Check the hoses for any fraying or splits. A damaged hose can lead to a loss of pressure and even injury.
Many experts say that a thorough visual inspection is your first line of defense against potential problems (OSHA guidelines). Look for oil stains on the ground underneath, which might signal a leak you need to address immediately. Don’t forget to inspect the electrical cord too; a damaged cord is a serious safety hazard.
Listen Carefully: The Sound Check
Your air compressor has a normal hum. You get used to it, right? But if you start hearing something different – a new knocking, grinding, or whistling sound – that’s your compressor telling you something is wrong. Changes in sound can indicate worn bearings or loose parts.
Sometimes, a sudden high-pitched whine might point to a relief valve issue or a struggling motor. We found that paying attention to these auditory cues can often help you identify problems early, before they become costly repairs. What does your compressor usually sound like?
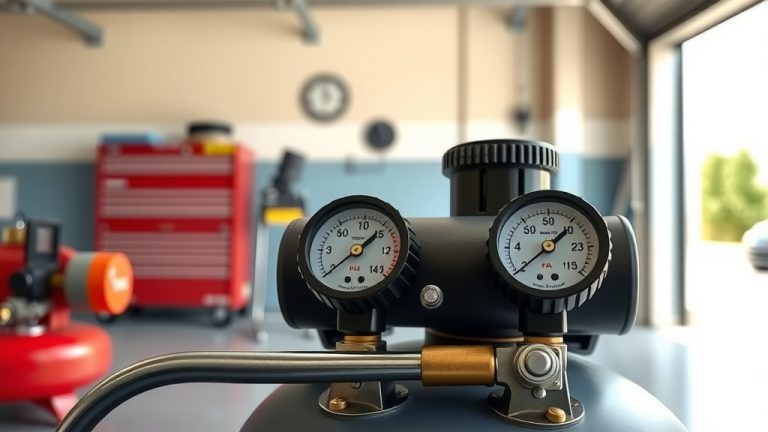
Verify Pressure Gauge Readings
Is your pressure gauge telling you the truth? An inaccurate gauge can lead to over-pressurization, which is dangerous, or under-pressurization, which makes your tools perform poorly. Compare the gauge reading with what you know your tools require. You want to see consistent pressure delivery.
If you suspect the gauge is off, you might need to use a separate, calibrated pressure tester to confirm its accuracy. Many manufacturers recommend this check periodically to ensure optimal performance and safety (Air Compressor Association). An unreliable gauge is like a speedometer that lies; it’s not helpful.
Inspect For Air Leaks
Air leaks are sneaky energy thieves. They make your compressor work harder than it needs to, wasting electricity and shortening its lifespan. How do you find them? Turn on your compressor, let it build pressure, then shut it off. Listen closely for hissing sounds around fittings, hoses, and the tank.
For tougher-to-find leaks, mix some soapy water in a spray bottle. Spray it over connections, valves, and any suspicious areas. If you see bubbles forming, you’ve found a leak! It’s like finding a tiny puncture in a bicycle tire. Fixing these leaks can improve efficiency dramatically.
Checking Your Air Tank’s Health
Your air tank holds all that pressurized air, making it a critical component. Check for any signs of rust on the outside, especially at the bottom. Rust can weaken the tank over time. We found that internal rust, caused by moisture, is a common issue too. This leads us to our next point.
Don’t Forget to Drain the Tank!
Every time you use your compressor, moisture condenses inside the tank. If you don’t drain it, this water can cause rust, reducing the tank’s capacity and integrity. Locate the drain valve, usually at the bottom of the tank, and open it. You’ll likely see rusty water come out. Do this regularly, perhaps after every few uses, or as recommended by your manual.
Draining the tank is like flushing out your car’s radiator – essential for longevity. It’s a simple step that has a huge impact on your compressor’s health and safety. Neglecting this is a recipe for disaster down the road.
Reviewing Your Compressor’s Lubrication
For oil-lubricated compressors, checking the oil level is as important as checking your car’s engine oil. Too little oil can lead to excessive wear and overheating. Too much oil can cause other problems. Consult your manual for the correct oil type and fill level. Most have a dipstick or a sight glass for easy checking.
We found that using the wrong oil or running with low oil is a leading cause of compressor failure. It’s a small detail, but it makes a big difference in how long your unit lasts. If you see very dark or milky oil, it might be time for an oil change or indicate water contamination.
Air Filter Inspection and Replacement
The air filter is your compressor’s lungs. It keeps dust and debris out of the motor and internal components. If the filter is clogged, your compressor has to work harder to pull in air, reducing efficiency and potentially causing damage. Take it out and examine it.
If it looks dirty or clogged, it’s time for a replacement. A clean filter ensures your compressor breathes easily and performs at its best. Think of it like a clogged vacuum filter; it just won’t clean right. Many experts suggest checking your air filter every few months, or more often in dusty environments.
Checking Safety Valves and Controls
The safety relief valve is a non-negotiable component. It automatically releases excess pressure if the primary pressure switch fails, preventing the tank from exploding. Test it by gently pulling its ring; you should hear a hiss of air. Make sure it snaps back securely. If it doesn’t, replace it.
Also, verify your pressure switch, the component that turns the compressor on and off at set pressure levels. Does it cut off at the correct maximum pressure? Does it kick back on when the pressure drops? These controls are your compressor’s safety net.
Hose and Fitting Integrity
We’ve mentioned hoses already, but let’s dive a bit deeper. Beyond obvious leaks, check for hardened, cracked, or soft spots in the hoses. These can indicate material fatigue and are prone to bursting under pressure. Ensure all quick-connect fittings are secure and not worn out, preventing accidental disconnections.
A loose fitting can not only cause air loss but also become a projectile. Research often connects proper hose maintenance with overall operational safety (National Fluid Power Association). It’s about keeping every piece of the puzzle in good shape.
Electrical Connections and Wiring
Before you touch anything electrical, *always unplug the compressor*. Check all wires for frays, nicks, or exposed copper. Loose or damaged wiring is a fire hazard and can cause electrical shorts. Ensure all connections are tight and clean. Oxidation can sometimes affect connectivity.
Many guidelines point to regular electrical checks as a good first step (NFPA 70, National Electrical Code). This might seem intimidating, but a visual inspection can reveal a lot. If you see anything suspicious, it’s always best to call a qualified technician.
Here’s a quick overview of what to check and how often:
| Component | What to Look For | Frequency |
|---|---|---|
| Visual Inspection | Damage, leaks, loose parts | Before each use |
| Air Tank Drain | Moisture, rust accumulation | Daily or after heavy use |
| Oil Level (if applicable) | Correct level, clear oil | Weekly / Every 10-20 hours |
| Air Filter | Cleanliness, clogs | Monthly / Every 50-100 hours |
| Safety Relief Valve | Functionality (test hiss) | Monthly |
Final Checklist Before Operation
Before you power up your air compressor for a project, run through this quick mental checklist. It’s a simple way to confirm everything is in order and you’re ready to go. Safety should always be your number one priority.
- Is the area around the compressor clear and well-ventilated?
- Are all hoses securely connected and free of visible damage?
- Is the pressure regulator set to the correct PSI for your tool?
- Did you drain the air tank if it’s been a while?
- Are all electrical connections secure and the power cord intact?
- Do you have your personal protective equipment (PPE) ready?
Conclusion
Checking your air compressor might seem like a chore, but it’s truly an investment in its longevity and your personal safety. By following these simple, practical steps, you can catch potential problems early, avoid costly breakdowns, and ensure your compressor is always ready for action. Remember, a little attention now saves a lot of trouble later. Keep it running smoothly, and it will serve you well for years to come.
What are the signs of a failing air compressor?
Common signs of a failing air compressor include unusual noises like grinding or knocking, frequent cycling (turning on and off too often), noticeable air leaks, a significant drop in pressure output, or the motor struggling to start. If you notice any of these, it’s a good idea to investigate further or seek professional help.
How often should I drain my air compressor tank?
You should drain your air compressor tank after every use or at least once a day if you use it regularly. This prevents moisture buildup, which can lead to rust inside the tank and compromise its structural integrity over time. Regular draining is a simple but critical maintenance step.
Can I use car engine oil in my air compressor?
No, you should not use car engine oil in your air compressor unless specifically stated by the manufacturer. Air compressors require specialized compressor oil that has different additives and viscosity for lubricating compressor pumps. Using the wrong oil can damage the pump and void your warranty.
What is the recommended PSI for most air tools?
Most common air tools, like nail guns, impact wrenches, and paint sprayers, typically operate efficiently at around 90 PSI (pounds per square inch). However, always check the specific pressure requirements for each tool you use in its instruction manual to ensure optimal performance and tool longevity.
Is it safe to leave my air compressor plugged in all the time?
It is generally not recommended to leave your air compressor plugged in all the time, especially if it’s not being used frequently. While modern compressors often have automatic shut-off features, unplugging it prevents accidental power surges, reduces standby power consumption, and eliminates any small risk of electrical issues when unattended.